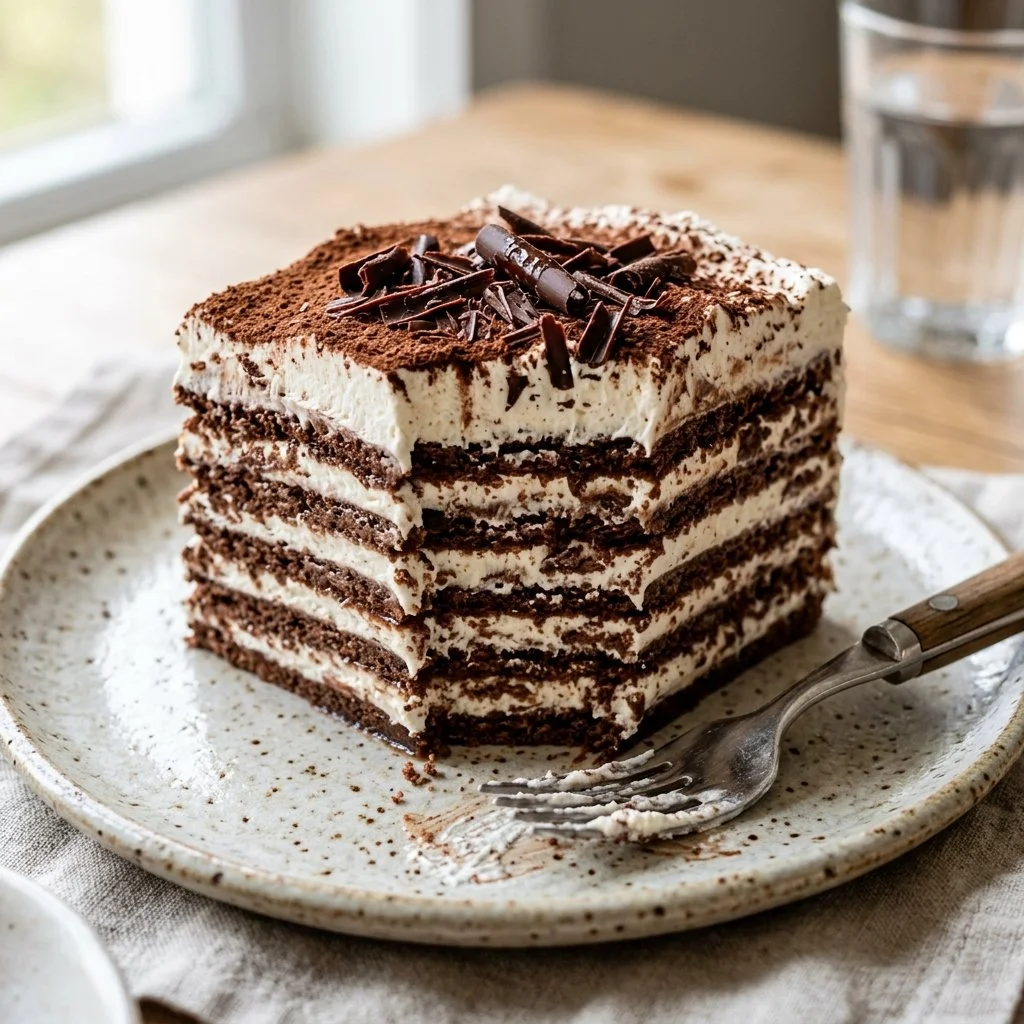
The sweetness of summer lingers in the air, and with it comes the joy of frozen desserts. I remember the very first time I tried icebox cake – a delightful combination of light, fluffy whipped cream layered with crunchy chocolate wafer cookies. It was a warm afternoon, and my grandmother had whipped it up for our family picnic. With each bite, I was transported to a slice of heaven, the chocolate melting against the cool cream, leaving me refreshed and blissfully content. Today, I want to invite you to create your own memorable moments with this simple yet delicious Icebox Cake.
Recipe Timing
- Prep Duration: 15 minutes
- Active Cooking: 15 minutes
- Total Duration: 4 hours (for chilling) or overnight
- Portion Size: Serves 8
- Complexity: Simple
Nutritional Recipe
- Calories per portion: Approximately 350
- Protein: 2 grams per serving
- Carbs: 24 grams per serving
- Fats: 30 grams per serving
- Fiber: 0 grams per serving
- Sugars: 24 grams per serving
- Sodium: 20 mg per serving
Why You’ll Love This Icebox Cake
This Icebox Cake is not just a dessert; it’s a celebration of simplicity and nostalgia. Its no-bake nature means you don’t have to worry about your kitchen heating up during those hot days. It’s an adaptable dessert that can be jazzed up with fresh berries or kept charmingly simple with just chocolate. Imagine serving it at gatherings, with guests delighting in the creamy layers that dance in their mouths, evoking cherished memories of summer days gone by.
The Complete Cooking Journey
Making this Icebox Cake can be a joyful experience, with just a handful of ingredients and effortless preparation. You’ll be blending rich heavy cream with sweet powdered sugar and a touch of vanilla. As you layer the cookies and the whipped cream, not only will you enjoy the process, but you’ll also be creating something that will make everyone smile come dessert time!
Ingredients:
- 2 cups heavy cream
- 1/2 cup powdered sugar
- 1 teaspoon vanilla extract
- 1 package of chocolate wafer cookies
- 1 cup fresh berries (optional)
Method:
Step 1: Whipping the Cream
In a mixing bowl, beat the heavy cream, powdered sugar, and vanilla extract until soft peaks form. You’ll want the cream to be just thick enough to hold its shape yet light and airy.
Step 2: Layering the Cookies
In a serving dish, start layering the chocolate wafer cookies, forming the base. It’s the perfect foundation for your fluffy whipped cream to sit upon.
Step 3: Creating the Creamy Layers
Spoon a generous layer of the whipped cream over the cookies. Smooth it out, allowing the creamy goodness to explore every corner of your dish.
Step 4: Building and Finishing
Continue layering cookies and cream until all ingredients are used. Finish your masterpiece with a lavish layer of whipped cream on top, declaring it the star of the show.
Step 5: Adding Fresh Berries (Optional)
If desired, decorate your creation by gently pressing fresh berries on top. They add a beautiful splash of color and freshness that complements the chocolate perfectly.
Step 6: Chilling for Perfection
Cover your dish with plastic wrap and refrigerate for at least 4 hours, or ideally, overnight to allow the cookies to soften and absorb the creamy goodness.
Step 7: Slicing and Serving
When you’re ready to enjoy, slice and serve chilled. Each bite will be a delightful combination of texture and flavor.
Serving Suggestions & Pairings
This Icebox Cake shines on its own but can be paired beautifully with a simple cup of coffee or a glass of cold milk. It also makes a delightful treat alongside fresh fruit salads or alongside a warm slice of pie for family gatherings.
Storage & Leftovers Guide
You can keep any leftovers in the refrigerator, tightly covered, for up to 3 days. As the days pass, the flavors meld more beautifully as the cookies continue to soften.
Kitchen Wisdom & Success Tips
- Use cold cream: Make sure your heavy cream is cold for better whipping results.
- Don’t overwhip: Keep an eye on your cream while beating; you want soft peaks, not stiff peaks.
- Prep in advance: This dessert benefits from overnight chilling, so plan ahead!
- Experiment: Feel free to switch up the flavors; add a splash of almond extract or a sprinkle of cocoa powder to the whipped cream for an interesting twist.
Flavor Variations & Adaptations
- Fruit-infused: Layer in your favorite fruits between cookies and cream.
- Nutty undertones: Incorporate crushed nuts into your whipped cream for added crunch.
- Different cookies: Try using vanilla wafers or graham crackers for a change.
Reader Questions & Solutions
- What can I use if I can’t find chocolate wafer cookies? Vanilla wafers or graham crackers work beautifully as substitutes.
- Can I make it dairy-free? Absolutely! Substitute heavy cream with coconut cream and use a vegan powdered sugar.
- How long should I let it chill? For best results, chill overnight, but a minimum of 4 hours is essential.
- What if my whipped cream isn’t thickening? Ensure your bowl and beaters are cold; you may also whip it a bit longer.
- Can I freeze the Icebox Cake? It can be frozen, but texture may change upon thawing after freezing.
Wrapping Up
With its nostalgic flavors and easy preparation, this Icebox Cake is sure to become a cherished favorite in your home, bringing smiles and sweet moments to your table. So, roll up your sleeves, gather your ingredients, and let the creativity flow. Here’s to sweet treats and wonderful memories! Happy baking!
PrintIcebox Cake
A delightful no-bake Icebox Cake combining rich whipped cream and chocolate wafer cookies, perfect for summer gatherings.
- Prep Time: 15 minutes
- Cook Time: 15 minutes
- Total Time: 240 minutes
- Yield: 8 servings 1x
- Category: Dessert
- Method: No-Bake
- Cuisine: American
- Diet: Vegetarian
Ingredients
- 2 cups heavy cream
- 1/2 cup powdered sugar
- 1 teaspoon vanilla extract
- 1 package of chocolate wafer cookies
- 1 cup fresh berries (optional)
Instructions
- Whip the heavy cream, powdered sugar, and vanilla extract until soft peaks form.
- Layer the chocolate wafer cookies in a serving dish.
- Spoon a generous layer of whipped cream over the cookies.
- Continue layering cookies and cream until all ingredients are used.
- Decorate with fresh berries on top if desired.
- Cover and refrigerate for at least 240 minutes, or ideally overnight.
- Slice and serve chilled.
Notes
Use cold cream for better whipping results; avoid overwhipping. This cake can be made dairy-free by substituting heavy cream with coconut cream.
Nutrition
- Serving Size: 1 serving
- Calories: 350
- Sugar: 24g
- Sodium: 20mg
- Fat: 30g
- Saturated Fat: 19g
- Unsaturated Fat: 5g
- Trans Fat: 0g
- Carbohydrates: 24g
- Fiber: 0g
- Protein: 2g
- Cholesterol: 0mg