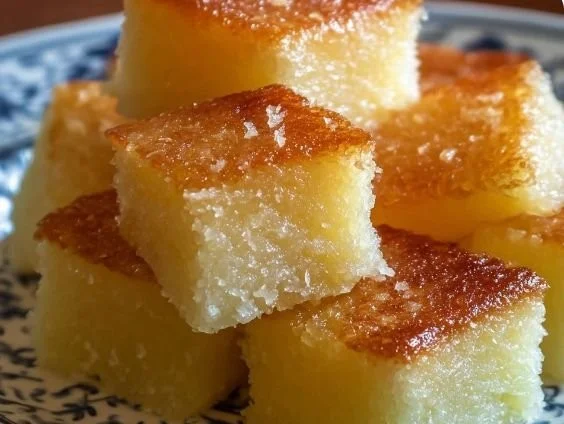
There’s something truly magical about the flavors of Hawaii that whisk you away to a sun-kissed beach, palm trees swaying lazily in the breeze. As I think back to my very first taste of Hawaiian butter mochi, I can almost hear the sound of waves lapping against the shore and feel the warm sand between my toes. This delightful dessert, with its rich, chewy texture, has a way of making every bite feel like a little sunshine on a plate. It’s sweet, comforting, and oh-so-satisfying—a true representation of the island spirit.
## Recipe Timing
- Prep Duration: 15 minutes
- Active Cooking: 40 minutes
- Total Duration: 55 minutes
- Portion Size: Serves 12
- Complexity: Simple
## Nutritional Recipe
- Calories per portion: Approximately 223
- Protein: 3g per serving
- Carbs: 31g per serving
- Fats: 10g per serving
- Fiber: 0g per serving
- Sugars: 12g per serving
- Sodium: 123mg per serving
## Why You’ll Love This Hawaiian Butter Mochi
The charm of Hawaiian butter mochi starts with its unique texture, thanks to sweet rice flour, which creates that sought-after chewiness. It’s not just a dessert; it’s a slice of culture, a tradition that brings families together. The combination of coconut milk and butter infuses a delicious tropical flavor that feels indulgent yet comforting. Perfect for potlucks or family gatherings, this dish is not only simple to make but can easily become your new go-to treat for any occasion.
## The Complete Cooking Journey
Embarking on the journey to make Hawaiian butter mochi is as enjoyable as eating it. From the first stir of ingredients to the warm, aromatic scent wafting through your kitchen as it bakes, you’ll feel like you’re crafting a little piece of paradise. Each step presents an opportunity to savor the sweet anticipation of indulging in this delightful confection.
## Ingredients:
- 2 cups sweet rice flour (mochi flour) – Essential for achieving the chewy texture.
- 1 cup granulated sugar
- 1 tablespoon baking powder
- 1 can coconut milk (13.5 oz)
- ½ cup unsalted butter, melted (Can be substituted with non-dairy butter.)
- 4 large eggs
- 1 teaspoon vanilla extract
- 1 cup milk (Add gradually until desired consistency.)
## Method:
### Step 1: Preheat the Oven
Start by preheating your oven to 350°F (175°C). This will ensure that your batter bakes evenly to a golden perfection.
### Step 2: Prepare the Baking Dish
Grease a 9×13-inch baking dish with a little butter or non-stick spray. This step is crucial to ensure your delicious butter mochi comes out easily after baking.
### Step 3: Combine Dry Ingredients
In a large mixing bowl, whisk together the sweet rice flour, granulated sugar, and baking powder. This blend sets the stage for the chewy texture we all adore.
### Step 4: Mix the Wet Ingredients
In a separate bowl, combine the coconut milk, melted butter, eggs, and vanilla extract. Use a whisk or an electric mixer to blend until entirely smooth, creating a luscious base for your mochi.
### Step 5: Combine Wet and Dry Ingredients
Pour the wet ingredients into the bowl with the dry ingredients. Mix them together gently, being careful not to overmix. The goal is to create a smooth batter that captures the essence of Hawaii.
### Step 6: Adjust the Consistency
Gradually add the milk to the batter, mixing until you reach a smooth and pourable consistency. Depending on your desired texture, you might need less or more milk, so add it slowly!
### Step 7: Pour and Bake
Pour the batter into your prepared baking dish and spread it evenly. Place it in the preheated oven and bake for about 40 minutes, or until the top is lightly golden and a toothpick inserted in the center comes out clean.
### Step 8: Cool and Cut
Once baked, remove the mochi from the oven and allow it to cool in the dish. After about 20 minutes, cut it into squares and transfer them to a wire rack to cool completely.
### Step 9: Serve and Enjoy
Serve your Hawaiian butter mochi at room temperature or slightly warm. Each bite is a delightful taste of the islands, perfect for sharing with friends and family!
## Serving Suggestions & Pairings
This Hawaii-inspired treat pairs beautifully with tropical fruit salads, whipped cream, or a scoop of vanilla ice cream. For an extra touch, try serving alongside a cup of coconut or hibiscus tea to elevate the experience.
## Storage & Leftovers Guide
Store any leftovers in an airtight container at room temperature for up to 3 days or in the refrigerator for up to a week. For longer storage, you can freeze the pieces for up to a month. Just thaw and enjoy!
## Kitchen Wisdom & Success Tips
- Measure Accurately: Precision is key when baking, so ensure your measurements are correct.
- Don’t Overmix: Overmixing can lead to a dense texture; mix just until combined.
- Watch the Baking Time: Ovens can differ, so check for doneness slightly before the recommended time.
## Flavor Variations & Adaptations
- For a chocolate twist, substitute some of the sweet rice flour with cocoa powder.
- Want a fruity vibe? Fold in diced pineapple or shredded coconut into the batter before baking for a sweet surprise.
## Reader Questions & Solutions
-
Can I use regular rice flour instead of sweet rice flour?
Sweet rice flour is essential for the chewy texture of mochi, so it’s best to stick to it! -
What can I substitute for coconut milk?
You can use almond milk or cashew milk, but keep in mind that the flavor will differ slightly. -
Why did my mochi come out too dense?
Overmixing the batter can cause this outcome; be gentle when combining wet and dry ingredients. -
Can I make it ahead of time?
Absolutely! It stores well and can be made a day in advance for better flavor development. -
What’s the best way to cut mochi?
To prevent sticking, lightly dust your knife with cornstarch before slicing.
## Wrapping Up
I invite you to take a journey to the Hawaiian islands through this delightful butter mochi. It’s not just a dessert; it’s an experience waiting to be shared. Whether you’re gathered with friends at a backyard barbecue or enjoying a quiet evening at home, this treat is bound to create smiles. So gather your ingredients, channel your inner island chef, and prepare for a mouthwatering adventure. Happy cooking!
PrintHawaiian Butter Mochi
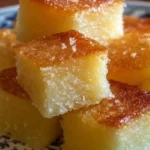
A delightful Hawaiian dessert with a rich, chewy texture that captures the essence of tropical flavors.
- Prep Time: 15 minutes
- Cook Time: 40 minutes
- Total Time: 55 minutes
- Yield: 12 servings 1x
- Category: Dessert
- Method: Baking
- Cuisine: Hawaiian
- Diet: Vegetarian
Ingredients
- 2 cups sweet rice flour (mochi flour)
- 1 cup granulated sugar
- 1 tablespoon baking powder
- 1 can coconut milk (13.5 oz)
- ½ cup unsalted butter, melted
- 4 large eggs
- 1 teaspoon vanilla extract
- 1 cup milk
Instructions
- Preheat your oven to 350°F (175°C).
- Grease a 9×13-inch baking dish with butter or non-stick spray.
- Whisk together the sweet rice flour, granulated sugar, and baking powder.
- Combine the coconut milk, melted butter, eggs, and vanilla extract in a separate bowl.
- Pour the wet ingredients into the dry ingredients and mix gently.
- Gradually add the milk to achieve a smooth batter.
- Pour the batter into the prepared baking dish and spread it evenly.
- Bake for about 40 minutes, until the top is lightly golden.
- Cool the mochi in the dish for about 20 minutes, then cut into squares.
- Serve at room temperature or slightly warm.
Notes
Store any leftovers in an airtight container for up to 3 days at room temperature or refrigerate for up to a week.
Nutrition
- Serving Size: 1 serving
- Calories: 223
- Sugar: 12g
- Sodium: 123mg
- Fat: 10g
- Saturated Fat: 5g
- Unsaturated Fat: 5g
- Trans Fat: 0g
- Carbohydrates: 31g
- Fiber: 0g
- Protein: 3g
- Cholesterol: 110mg