There’s something profoundly nostalgic about opening a box of Cheez-Its—those crunchy little squares that bring a wave of memories, from school lunches to late-night snack attacks. But as I sat at my kitchen table recently, I realized that I wanted to recreate that magic from scratch. What if I could harness that addictive flavor and texture in my own home? After some tinkering, I discovered a recipe for Homemade Cheez-Its that not only satisfied my cravings but also filled my home with the divine aroma of baking cheese. Join me as we dive into this comforting culinary venture!
Recipe Timing
- Prep Duration: 15 minutes
- Active Cooking: 15 minutes
- Total Duration: 30 minutes
- Portion Size: About 30 crackers
- Complexity: Simple
Nutritional Recipe
- Calories per portion: Approximately 100
- Protein: 3 grams
- Carbs: 10 grams
- Fats: 6 grams
- Fiber: 0 grams
- Sugars: 0 grams
- Sodium: 150 mg
Why You’ll Love This Homemade Cheez-Its Recipe
Imagine crispy, cheesy crackers that shatter in your mouth with a savory punch. These Homemade Cheez-Its are easy to whip up, made from simple ingredients, and offer a unique twist that store-bought varieties can’t match. You can experiment with flavors by adjusting the spices and even swapping cheeses. Plus, making them yourself means you can indulge without the preservatives and additives that often come in packaged snacks.
The Complete Cooking Journey
Turning simple ingredients into something magical is the heart of cooking. The sound of the food processor whirring as it combines the cheese and butter, the comforting sight of dough forming on your floured countertop, and finally, the delight of pulling a baking sheet covered in golden-brown crackers from the oven—this process is as joyful as the first bite itself. Let’s get started!
Ingredients:
- 8 ounces sharp cheddar cheese, finely shredded
- 1 cup all-purpose flour
- 4 tablespoons cold unsalted butter, cubed
- 1/2 teaspoon salt
- 1/4 teaspoon paprika
- 1/4 teaspoon garlic powder (optional)
- 2 to 3 tablespoons ice water
Method:
Step 1: Preheat the Oven and Prepare the Baking Sheet
Set your oven to 375°F and line a baking sheet with parchment paper to prevent sticking and ensure even baking. The smell of baking cheese will fill the air—trust me, you’ll want to set the stage right!
Step 2: Combine Dry Ingredients and Cheese
In a food processor, add the shredded cheddar cheese, all-purpose flour, cold cubed butter, salt, paprika, and garlic powder (if using). Pulse these ingredients until the mixture resembles coarse crumbs. This step is crucial for achieving that perfect crumbly texture in your finished crackers.
Step 3: Form the Dough
Gradually add ice water one tablespoon at a time into the food processor, pulsing after each addition until the mixture comes together to form a cohesive dough ball. Don’t rush this part; the right amount of water is key to your dough maintaining its integrity.
Step 4: Roll Out the Dough
Transfer the dough onto a lightly floured surface and roll it out as thin as possible, about 1/8 inch thick. A thin layer is essential for achieving that iconic crispy bite that Cheez-Its are known for!
Step 5: Cut the Dough Into Squares
Using a pizza cutter or sharp knife, cut the dough into 1-inch squares. Then, use the tip of a skewer or toothpick to poke a small hole in the center of each square to mimic the classic Cheez-It look. This step not only adds a nostalgic touch but also helps the crackers bake evenly.
Step 6: Bake the Crackers
Place the cracker squares onto the prepared baking sheet, leaving a small space between each to allow for even cooking. Bake in the preheated oven for 12 to 15 minutes or until the edges turn lightly golden and the crackers are crisp.
Step 7: Cool and Enjoy
Remove the crackers from the oven and let them cool completely on a wire rack to ensure they become extra crunchy before serving. The hardest part? Waiting for them to cool before you dive in!
Serving Suggestions & Pairings
These Homemade Cheez-Its are fantastic on their own, but you can also pair them with your favorite dips like guacamole, salsa, or even a spicy cheese spread for an irresistible snack platter. They also make a delightful addition to a charcuterie board—add some olives, cured meats, and fresh fruits for a charming presentation.
Storage & Leftovers Guide
Store your Homemade Cheez-Its in an airtight container at room temperature for up to a week. Just be warned: they might not last that long! For longer storage, freeze the unbaked dough for up to a month. Just thaw and bake when the craving strikes!
Kitchen Wisdom & Success Tips
- Shredding cheese: Freshly shredded cheese is a must—use a block! Pre-shredded varieties often contain anti-caking agents that can affect the texture.
- Chilling the dough: If the dough feels too warm, pop it in the fridge for 15 minutes to give you a better rolling experience.
- Thickness matters: Keeping an eye on the thickness of your dough will ensure you’re aiming for that perfect crisp.
Flavor Variations & Adaptations
Feel free to get creative! Add cracked black pepper for a spicy kick, or swap in different cheeses like gouda or pepper jack for a unique flavor. You can also try enhancing the savory profile with dried herbs like rosemary or thyme.
Reader Questions & Solutions
-
Why did my crackers turn out soft?
- Ensure they are baked until lightly golden and crisp. If they seem soft out of the oven, let them cool completely before storing.
-
Can I use whole wheat flour instead of all-purpose flour?
- Yes! Whole wheat flour can give your crackers a nuttier flavor and is a great healthier option.
-
What can I do if my dough is too crumbly?
- Gradually add a bit more ice water, just a teaspoon at a time, until it comes together.
-
Is it necessary to use a food processor?
- While it makes the process quicker and easier, you can also mix the ingredients by hand using a pastry cutter or your fingers.
-
Can I add different spices?
- Absolutely! Experiment with spices like cayenne, chili powder, or Italian seasoning to customize the flavors to your liking.
Wrapping Up
There’s something truly special about creating your favorite snacks from scratch, and these Homemade Cheez-Its are a delightful way to indulge while feeling a bit of that nostalgic magic. So gather your ingredients, invite a friend over, and enjoy the process of making these crispy, cheesy treats. You’ll never look at store-bought crackers the same way again! Happy baking!
PrintHomemade Cheez-Its

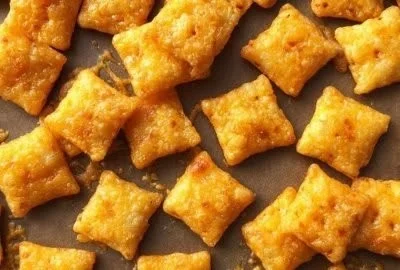
Crispy, cheesy crackers that bring a wave of nostalgia and are easy to make from scratch.
- Prep Time: 15 minutes
- Cook Time: 15 minutes
- Total Time: 30 minutes
- Yield: 30 crackers 1x
- Category: Snack
- Method: Baking
- Cuisine: American
- Diet: Vegetarian
Ingredients
- 8 ounces sharp cheddar cheese, finely shredded
- 1 cup all-purpose flour
- 4 tablespoons cold unsalted butter, cubed
- 1/2 teaspoon salt
- 1/4 teaspoon paprika
- 1/4 teaspoon garlic powder (optional)
- 2 to 3 tablespoons ice water
Instructions
- Preheat the oven to 375°F and line a baking sheet with parchment paper.
- Combine the shredded cheddar cheese, flour, cubed butter, salt, paprika, and garlic powder in a food processor. Pulse until it resembles coarse crumbs.
- Gradually add ice water, one tablespoon at a time, pulsing until the mixture forms a cohesive dough ball.
- Transfer the dough onto a lightly floured surface and roll it out to about 1/8 inch thick.
- Cut the dough into 1-inch squares and poke a small hole in each square.
- Place the squares on the baking sheet, spaced apart, and bake for 12 to 15 minutes until edges are lightly golden.
- Remove from the oven and let them cool completely on a wire rack.
Notes
Feel free to experiment with different cheeses and spices to customize the flavor.
Nutrition
- Serving Size: 1 serving
- Calories: 100
- Sugar: 0g
- Sodium: 150mg
- Fat: 6g
- Saturated Fat: 4g
- Unsaturated Fat: 2g
- Trans Fat: 0g
- Carbohydrates: 10g
- Fiber: 0g
- Protein: 3g
- Cholesterol: 15mg