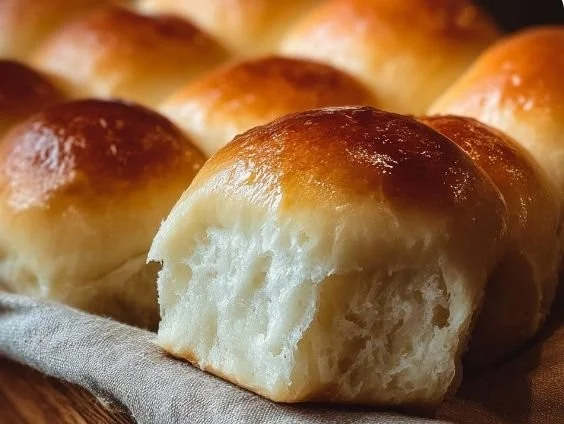
There’s something truly magical about the smell of freshly baked bread wafting through your home. It’s warm, inviting, and instantly takes me back to my childhood kitchen, where my grandmother would bake her famous rolls every Sunday. I can still picture her, dusted in flour with a splash of melted butter glistening on her hands, singing softly as she kneaded the dough. Those rolls were a staple at our family gatherings, and they never lasted long on the table. They were soft, fluffy, and had just the right amount of buttery goodness. Today, I want to share that feeling with you through my recipe for Soft and Buttery Homemade Rolls that are sure to become a comforting favorite in your home, just as they have in mine.
Recipe Timing
- Prep Duration: 15 minutes
- Active Cooking: 30 minutes
- Total Duration: 2 hours (including rising time)
- Portion Size: Serves about 12 rolls
- Complexity: Simple
Nutritional Recipe
- Calories per portion: Approximately 160 calories
- Protein: 4g
- Carbs: 25g
- Fats: 5g
- Fiber: 1g
- Sugars: 2g
- Sodium: 200mg
Why You’ll Love This Soft and Buttery Homemade Rolls
These Soft and Buttery Homemade Rolls are not just any bread; they are a hug in the form of food. Each roll is pillowy soft with a slightly crispy exterior, perfect for soaking up gravies or slathering with your favorite butter. They are incredibly versatile, too; whether you’re celebrating a special occasion, having a simple family dinner, or just enjoying a cozy night in, these rolls will elevate any meal. Plus, they’re fun to make, allowing you to connect with your kitchen and create something truly beautiful and delicious.
The Complete Cooking Journey
Making rolls from scratch is a journey filled with sweet anticipation. You’ll begin by mixing the ingredients, letting the dough rise, shaping it into perfectly round rolls, and finally baking them to golden perfection. The entire process is straightforward, and each step brings you closer to that delightful moment when you pull a warm batch from the oven, ready to share with family and friends.
Ingredients:
- 4 cups all-purpose flour
- 1 packet instant yeast (about 2.25 teaspoons)
- 1/4 cup granulated sugar
- 1 teaspoon salt
- 1 cup warm milk (make sure it’s Halal-certified)
- 1/4 cup unsalted butter (melted)
- 2 large eggs (beaten)
- Additional melted butter (for brushing, optional)
Method:
Step 1: Combine Dry Ingredients
In a large mixing bowl, whisk together the all-purpose flour, instant yeast, granulated sugar, and salt. Mixing these dry ingredients first ensures that the yeast distributes evenly throughout the flour.
Step 2: Mix Wet Ingredients
In a separate bowl, mix the warm milk, melted butter, and beaten eggs. The warmth of the milk is essential as it activates the yeast, allowing your rolls to rise beautifully.
Step 3: Combine Wet and Dry Mixtures
Gradually add the wet ingredients to the dry mixture. Stir using a wooden spoon or a spatula until the dough starts to come together. If it feels too sticky, you can add a tiny bit more flour.
Step 4: Knead the Dough
Transfer the dough onto a floured surface and knead for about 5-7 minutes, until it’s smooth and elastic. This is where the magic happens, giving your rolls the perfect texture.
Step 5: First Rise
Place the kneaded dough into a greased bowl, cover it with a clean kitchen towel, and let it rise in a warm place for about 1 hour, or until it doubles in size.
Step 6: Shape the Rolls
Once the dough has risen, gently deflate it and transfer it onto a floured surface. Divide the dough into 12 equal pieces and shape each piece into a ball. Place the rolls seam-side down in a greased baking dish, ensuring they are close together but not touching.
Step 7: Second Rise
Cover the rolls with the kitchen towel again and let them rise for another 30 minutes, or until they puff up.
Step 8: Preheat the Oven
While the rolls are rising, preheat your oven to 350°F (175°C). This gives the oven enough time to reach the perfect baking temperature.
Step 9: Bake to Perfection
Brush the tops of the rolls with additional melted butter if desired, and bake in the preheated oven for 20-25 minutes, or until the rolls are golden brown and sound hollow when tapped on the bottom.
Step 10: Cooling and Serving
Remove the rolls from the oven and allow them to cool in the pan for about 10 minutes before transferring them to a wire rack. The cooling process helps them firm up while keeping them fluffy inside.
Serving Suggestions & Pairings
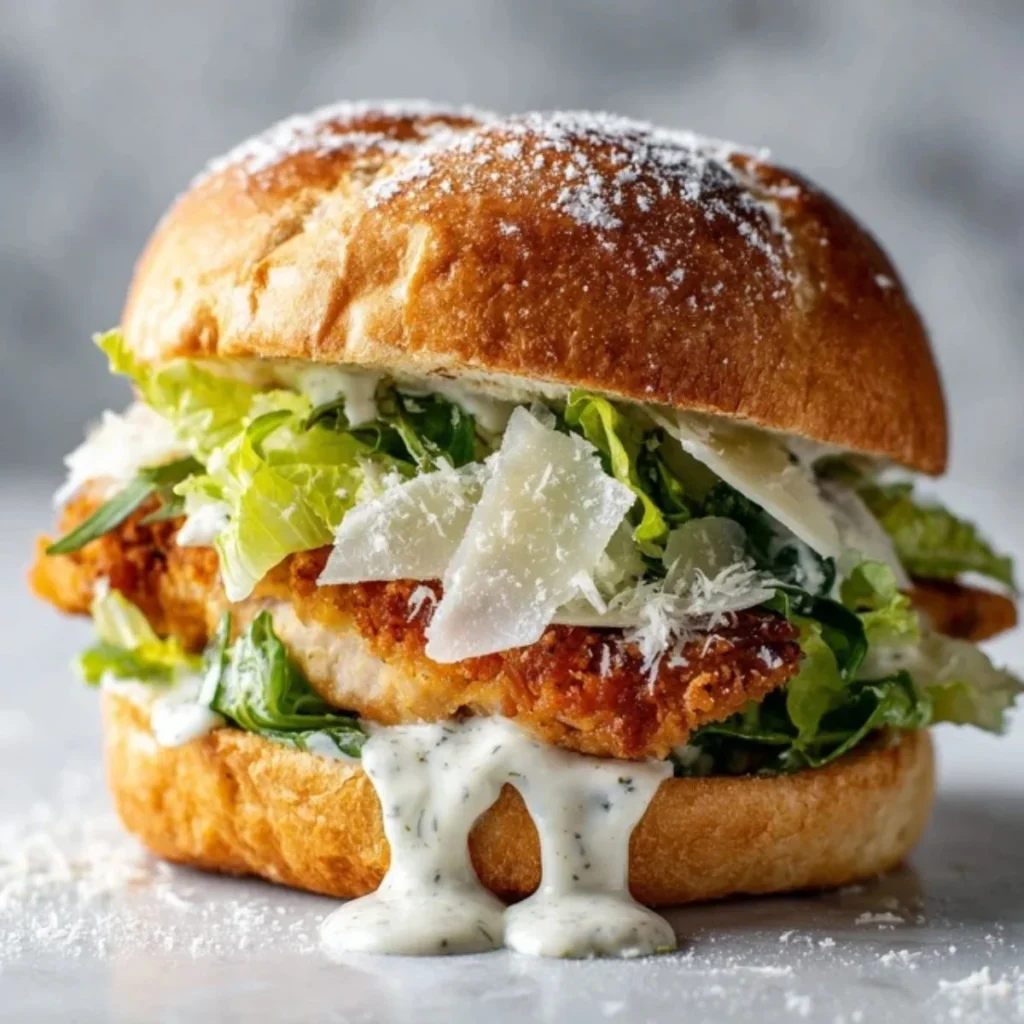
These rolls are wonderful on their own with a swipe of warm butter but serve them alongside your favorite soups, stews, or roasted meats for a truly satisfying meal. They also make excellent sliders or mini sandwiches, filled with your choice of deli meats and cheeses.
Storage & Leftovers Guide
You can store leftover rolls at room temperature in an airtight container for up to 3 days. For longer-lasting freshness, freeze them in a freezer-safe bag for up to 3 months. Just pop them in the microwave or oven to warm them up when you’re ready to enjoy!
Kitchen Wisdom & Success Tips
- Measure Carefully: Baking is a science, so be precise with your measurements for the best results.
- Warm Environment for Rising: If your kitchen is cool, try placing the dough in an oven that’s turned off but has the light on to create a warm environment for rising.
- Experiment with Flours: Feel free to mix in whole wheat flour or other flours for added flavor and nutrition.
- Butter for Brushing: Brushing the rolls with melted butter before and after baking adds a beautiful sheen and richness.
- Check Doneness: Use a thermometer to check that the internal temperature of the rolls is about 190°F (88°C) for optimal doneness.
Flavor Variations & Adaptations
Spice up your rolls by adding fresh herbs like rosemary or thyme to the dough. You can also incorporate shredded cheese for cheesy rolls, or make cinnamon rolls by adding a mixture of sugar and cinnamon to the dough before shaping.
Reader Questions & Solutions
- Why did my rolls not rise? If your rolls didn’t rise, your yeast might be expired or the milk too hot or cold. Ensure you’re using fresh yeast and warm milk to activate it properly.
- Can I make this dough ahead of time? Yes! You can make this dough the night before, let it rise, punch it down, and refrigerate it overnight. Let it come back to room temperature before baking.
- How can I make these rolls gluten-free? Substitute all-purpose flour with a 1:1 gluten-free baking flour, and add a bit of xanthan gum for structure.
- What can I use instead of eggs? You can use flax eggs (1 tbsp ground flaxseed + 2.5 tbsp water) for binding instead of eggs, which will work quite well.
- How do I know if I’ve overbaked them? Overbaked rolls will be dry and too hard. Keep an eye on them in the last few minutes of baking to ensure they’re just golden.
Wrapping Up
There you have it: a journey to create Soft and Buttery Homemade Rolls that can easily become a cherished recipe in your household. The joy of baking these rolls lies not just in the final product but in the memories created while baking them. I hope this recipe brings warmth to your kitchen and fills your home with delightful aromas. Happy baking, friends!
PrintSoft and Buttery Homemade Rolls
These Soft and Buttery Homemade Rolls are pillowy soft, perfect for soaking up gravies or slathering with butter, making them a comforting favorite.
- Prep Time: 15 minutes
- Cook Time: 30 minutes
- Total Time: 120 minutes
- Yield: 12 rolls 1x
- Category: Bread
- Method: Baking
- Cuisine: American
- Diet: Vegetarian
Ingredients
- 4 cups all-purpose flour
- 1 packet instant yeast (about 2.25 teaspoons)
- 1/4 cup granulated sugar
- 1 teaspoon salt
- 1 cup warm milk (Halal-certified)
- 1/4 cup unsalted butter (melted)
- 2 large eggs (beaten)
- Additional melted butter (for brushing, optional)
Instructions
- Combine Dry Ingredients: In a large mixing bowl, whisk together the all-purpose flour, instant yeast, granulated sugar, and salt.
- Mix Wet Ingredients: In a separate bowl, mix the warm milk, melted butter, and beaten eggs.
- Combine Wet and Dry Mixtures: Gradually add the wet ingredients to the dry mixture. Stir until the dough starts to come together.
- Knead the Dough: Transfer the dough onto a floured surface and knead for about 5-7 minutes, until it’s smooth and elastic.
- First Rise: Place the kneaded dough into a greased bowl, cover it, and let it rise for about 1 hour, or until it doubles in size.
- Shape the Rolls: Gently deflate the dough and divide it into 12 equal pieces, shaping each piece into a ball.
- Second Rise: Cover the rolls with a kitchen towel and let them rise for another 30 minutes.
- Preheat the Oven: Preheat your oven to 350°F (175°C).
- Bake to Perfection: Brush the tops with melted butter if desired, and bake for 20-25 minutes until golden brown.
- Cooling and Serving: Allow the rolls to cool in the pan for about 10 minutes before transferring them to a wire rack.
Notes
For a richer taste, brush the rolls with melted butter before and after baking.
Nutrition
- Serving Size: 1 roll
- Calories: 160
- Sugar: 2g
- Sodium: 200mg
- Fat: 5g
- Saturated Fat: 2g
- Unsaturated Fat: 2g
- Trans Fat: 0g
- Carbohydrates: 25g
- Fiber: 1g
- Protein: 4g
- Cholesterol: 60mg