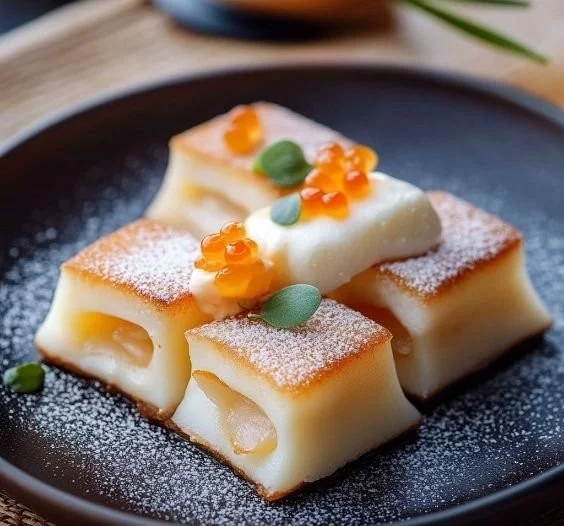
There are moments in life that stitch memories together, often revolving around the comfort of good food. As I sat in my cozy kitchen, the golden afternoon light filtering through the curtains, I was reminded of a trip to Japan—a place where sweets delicately balance simplicity and intricacy. Among the many delightful treats I encountered, Shiroi Koibito stood out. This sweet biscuit, filled with luscious white chocolate, is as enchanting to the palate as it is to the eyes. It instantly transported me back to a tiny café in Sapporo where I first tasted this treat. Now, I’m excited to share this delightful recipe with you, so you can create your own little piece of Japan right at home!
Recipe Timing
- Prep Duration: 15 minutes
- Active Cooking: 12 minutes
- Total Duration: 27 minutes
- Portion Size: 8 servings
- Complexity: Simple
Nutritional Recipe
- Calories per portion: Approximately 120 calories
- Protein: 1.5 grams
- Carbs: 15 grams
- Fats: 7 grams
- Fiber: 0 grams
- Sugars: 6 grams
- Sodium: 30 mg
Why You’ll Love This Shiroi Koibito
The magic of Shiroi Koibito lies in its balance of textures and sweetness. The crumbly biscuit pairs beautifully with the creamy white chocolate filling, making each bite melt in your mouth. Not only do they appeal to your taste buds, but they also look delightful on a plate, perfect for sharing with friends or enjoying during a cozy evening at home.
The Complete Cooking Journey
Embarking on the journey of creating Shiroi Koibito is like taking a culinary walk through memory lane. You’ll find joy in every step—from creaming the butter and sugar to baking until golden brown. The final assembly, where biscuits come together with a chocolate hug, is sure to invite anticipation.
Ingredients:
- 100g all-purpose flour
- 50g butter, softened
- 50g powdered sugar
- 1 egg yolk
- A pinch of salt
- 100g white chocolate
Method:
Step 1: Preheat Your Oven
Preheat your oven to 170°C (340°F) to prepare it for the deliciousness to come.
Step 2: Cream Butter and Sugar
In a bowl, cream together the softened butter and powdered sugar until the mixture is light and fluffy. This will create a wonderful base for your dough.
Step 3: Incorporate Egg Yolk
Add the egg yolk to the bowl and mix well until fully combined, enriching the texture and flavor.
Step 4: Combine Dry Ingredients
Gradually add the flour and a pinch of salt to your butter mixture. Mix until a smooth dough forms, bringing together all the elements beautifully.
Step 5: Roll Out the Dough
Roll the dough out to about 5mm thick, and make use of your creativity to cut it into desired shapes. You can go for classics like circles or hearts, depending on your mood!
Step 6: Bake the Biscuits
Place the shaped biscuits on a baking sheet and bake for 10-12 minutes until they are lightly golden. Your kitchen will soon be filled with the irresistible scent of baking!
Step 7: Cool the Biscuits
Allow the biscuits to cool completely on a wire rack. This step is crucial for ensuring they hold up when you add that delicious chocolate.
Step 8: Melt and Prepare the Chocolate
Melt the white chocolate and spread it generously on one biscuit. This silky layer is what makes Shiroi Koibito so delightful.
Step 9: Assemble the Biscuits
Carefully sandwich the chocolate-covered biscuit with another biscuit. Let the chocolate set before serving, allowing your creation to shine!
Serving Suggestions & Pairings
These Shiroi Koibito biscuits are a perfect accompaniment to a cup of tea or coffee, elevating your afternoon snack. You could also pair them with fresh berries or a dollop of whipped cream for a delightful dessert experience.
Storage & Leftovers Guide
Store any leftovers in an airtight container at room temperature for up to 5 days. If you want to keep the chocolate filling from melting, consider refrigerating them, but let them come to room temperature before serving for the best texture.
Kitchen Wisdom & Success Tips
- Make sure your butter is softened: This allows for easier creaming and a smoother dough.
- Don’t skip the cooling step: Chilling the biscuits prevents the chocolate from melting completely when you assemble them.
- Experiment with shapes: Have fun with cookie cutters; it’s a great way to get the kids involved!
Flavor Variations & Adaptations
Feel free to add a hint of vanilla or almond extract to the dough for added flavor. You could also experiment with different types of chocolate or even fillings, such as a layer of jam for a fruity twist.
Reader Questions & Solutions
-
Can I substitute the flour?
Yes! You can use a gluten-free flour blend to make these biscuits gluten-free. -
What if I don’t have white chocolate?
You can easily swap it for dark chocolate or even a flavored chocolate that you enjoy! -
How can I make these dairy-free?
Simply substitute the butter with a dairy-free alternative and use dairy-free chocolate. -
Can I freeze the dough?
Absolutely! You can freeze the unbaked dough for up to a month. Just thaw and bake as directed when you’re ready! -
What should I do if my dough seems too crumbly?
If the dough isn’t coming together, you may add a tiny splash of milk to help bind it.
Wrapping Up
Creating Shiroi Koibito in your kitchen is more than just baking; it’s about reliving memories and igniting new ones. With its simple ingredients and charming presentation, this recipe is bound to bring joy not only to your taste buds but also to the hearts of those you share it with. So, roll up your sleeves, don your apron, and let’s bake some happiness!
PrintShiroi Koibito

A delightful Japanese biscuit filled with luscious white chocolate, reminiscent of a magical trip to Japan.
- Prep Time: 15 minutes
- Cook Time: 12 minutes
- Total Time: 27 minutes
- Yield: 8 servings 1x
- Category: Dessert
- Method: Baking
- Cuisine: Japanese
- Diet: Vegetarian
Ingredients
- 100g all-purpose flour
- 50g butter, softened
- 50g powdered sugar
- 1 egg yolk
- A pinch of salt
- 100g white chocolate
Instructions
- Preheat your oven to 170°C (340°F) to prepare it for the deliciousness to come.
- Cream together the softened butter and powdered sugar until light and fluffy.
- Add the egg yolk to the bowl and mix well until fully combined.
- Gradually add the flour and a pinch of salt to the butter mixture, mixing until a smooth dough forms.
- Roll the dough out to about 5mm thick, and cut it into desired shapes.
- Place the shaped biscuits on a baking sheet and bake for 10-12 minutes until lightly golden.
- Allow the biscuits to cool completely on a wire rack.
- Melt the white chocolate and spread it generously on one biscuit.
- Carefully sandwich the chocolate-covered biscuit with another biscuit.
Notes
Store leftovers in an airtight container for up to 5 days at room temperature or refrigerate to prevent chocolate melting.
Nutrition
- Serving Size: 1 serving
- Calories: 120
- Sugar: 6g
- Sodium: 30mg
- Fat: 7g
- Saturated Fat: 4g
- Unsaturated Fat: 2g
- Trans Fat: 0g
- Carbohydrates: 15g
- Fiber: 0g
- Protein: 1.5g
- Cholesterol: 40mg