There’s something undeniably magical about the scent of melting chocolate wafting through the kitchen, especially when combined with the crunch of crispy cereal and the sweetness of graham crackers. I first discovered these Chocolate Crunch Bars during a family gathering where desserts were the highlight of the day. They were such crowd-pleasers, instantly disappearing from the table that I knew I had to whip them up at home. Each bite is like a nostalgic visit to my childhood, where simplicity took center stage, and pure joy came from flavors that felt both familiar and indulgent. Let’s dive into this delightful treat that brings comfort and happiness to the table.
Recipe Timing
- Prep Duration: 15 minutes
- Active Cooking: 10-12 minutes
- Total Duration: 1 hour 30 minutes (including chilling time)
- Portion Size: 12-16 servings
- Complexity: Simple
Nutritional Recipe
- Calories per portion: Approximately 180
- Protein: 2g per serving
- Carbs: 23g per serving
- Fats: 9g per serving
- Fiber: 1g per serving
- Sugars: 9g per serving
- Sodium: 80mg per serving
Why You’ll Love This Chocolate Crunch Bars
These Chocolate Crunch Bars are an absolute delight! They meld the joy of crispy cereal with the decadence of melted chocolate, creating a texture that crunches and melts in perfect harmony. They’re easy to make, require minimal prep, and can be customized with various add-ins, whether you enjoy a hint of peanut butter richness or want to experiment with different types of chocolate. Plus, they are the perfect treat for any occasion—be it a family picnic, birthday celebration, or just a cozy night in.
The Complete Cooking Journey
Creating these bars is almost therapeutic. You’ll start by gathering your ingredients, each one ready to contribute to this sweet symphony. Next, the combination of ingredients and the act of pressing them into the pan brings a satisfying tactile experience. And, of course, there’s the thrill of watching them bake, followed by the anticipation of the chocolate’s melting magic!
Ingredients:
- 3 cups crispy cereal (Rice Krispies or cornflakes)
- 1½ to 2 cups graham cracker crumbs
- 1 cup (approximately 2 sticks) unsalted butter, melted
- 1 cup brown sugar
- ½ teaspoon salt
- 2 cups chocolate chips (milk, dark, or semi-sweet)
- 2 to 3 tablespoons peanut butter (optional for creaminess)
Method:
Step 1: Preheat the Oven and Prep the Pan
Preheat your oven to 350 °F (175 °C). Prepare a 9×13-inch pan by lining it with parchment paper or greasing it lightly. This will ensure that your crunchy bars come out easily once set.
Step 2: Combine the Crunchy Base
In a large mixing bowl, combine the crispy cereal, graham cracker crumbs, melted butter, brown sugar, and salt. Mix everything together until it’s evenly combined.
Step 3: Press into the Pan
Transfer the mixture into your prepared pan and press it firmly into the bottom in an even layer. This step is crucial for ensuring the bars hold their shape.
Step 4: Bake the Base
Place the pan in the preheated oven and bake for 10 to 12 minutes, or until the mixture is set and lightly golden. This toasty step enhances the flavors wonderfully!
Step 5: Add the Chocolate
Remove the pan from the oven and immediately sprinkle the chocolate chips evenly over the warm base. The warmth will start to melt the chips, creating a luscious layer.
Step 6: Swirl in Peanut Butter
If you’re feeling indulgent (and why not?), add small dollops of peanut butter over the chocolate chips. The creamy goodness adds an extra layer of richness.
Step 7: Spread the Melted Chocolate
Allow the chocolate to soften for a few minutes, then take a spatula to gently spread it into a smooth layer over the base.
Step 8: Chill to Set
Refrigerate the bars for at least 1 to 2 hours until the chocolate is firmly set. This chilling step is essential for achieving a clean cut.
Step 9: Cut and Serve
Once set, lift the bars out of the pan using the parchment edges. Cut them into squares or rectangles—whatever size suits your fancy—and prepare for smiles!
Serving Suggestions & Pairings
These Chocolate Crunch Bars are delightful on their own, but you can elevate your serving experience by pairing them with a scoop of vanilla ice cream or a dollop of whipped cream. A drizzle of caramel or an accompanying cup of coffee would also make for a delicious treat during an afternoon break.
Storage & Leftovers Guide
Store any leftover bars in an airtight container at room temperature for up to a week. If you prefer them chilled, you can keep them in the refrigerator for up to two weeks. Just be sure to separate layers with parchment paper to maintain their texture.
Kitchen Wisdom & Success Tips
- Make sure the mixture is firmly pressed into the pan; this helps the bars hold together better after baking and chilling.
- If using the optional peanut butter, consider warming it slightly before dolloping it on the chocolate chips for easier spreading.
- Feel free to experiment with other mix-ins, like nuts, dried fruit, or even sprinkles on top for an extra flair.
Flavor Variations & Adaptations
If you want to switch things up, try using different types of cereal for a unique flavor and texture. Cocoa Crisps, Cheerios, or even granola can add a fun twist. You could also substitute almond butter or sunflower seed butter for the peanut butter, making it suitable for nut-free diets.
Reader Questions & Solutions
-
Can I use margarine instead of butter?
Yes, margarine can work as a substitute, though it may slightly alter the flavor and texture. -
Is it necessary to refrigerate these bars?
Refrigerating helps to firm up the chocolate, but if you prefer a softer bar, you can skip this step. -
What can I do if my bars are too crumbly?
Make sure your mixture is pressed firmly into the pan. If crumbly, you might need to increase the amount of melted butter. -
Can I substitute graham cracker crumbs?
Absolutely! You can use crushed cookies, digestive biscuits, or even vanilla wafers as an alternative. -
How can I tell when the bottom layer is done baking?
Look for a light golden color around the edges and a firm texture. Tapping the top should feel solid, not mushy.
Wrapping Up
These Chocolate Crunch Bars are not just a recipe—they’re a joyous celebration of flavors and textures. They remind us that sometimes, the simplest things can bring us the greatest joy. Whether you’re planning a gathering or just craving something sweet, these bars will surely satisfy your taste buds and warm your heart. So grab your ingredients and let’s create some delicious memories together!
PrintChocolate Crunch Bars

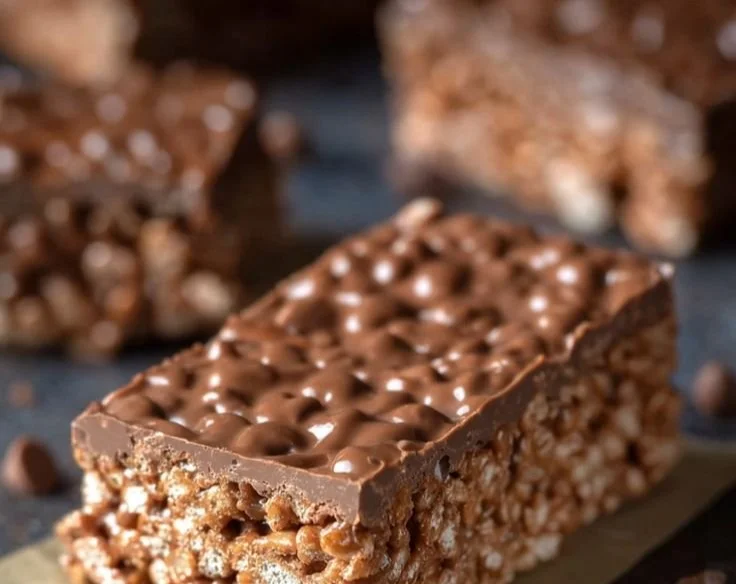
These Chocolate Crunch Bars combine crispy cereal, graham crackers, and melted chocolate for a nostalgic and indulgent treat.
- Prep Time: 15 minutes
- Cook Time: 12 minutes
- Total Time: 90 minutes
- Yield: 12-16 servings 1x
- Category: Dessert
- Method: Baking
- Cuisine: American
- Diet: Vegetarian
Ingredients
- 3 cups crispy cereal (Rice Krispies or cornflakes)
- 1½ to 2 cups graham cracker crumbs
- 1 cup (approximately 2 sticks) unsalted butter, melted
- 1 cup brown sugar
- ½ teaspoon salt
- 2 cups chocolate chips (milk, dark, or semi-sweet)
- 2 to 3 tablespoons peanut butter (optional for creaminess)
Instructions
- Preheat your oven to 350 °F (175 °C). Prepare a 9×13-inch pan by lining it with parchment paper or greasing it lightly.
- Combine the crispy cereal, graham cracker crumbs, melted butter, brown sugar, and salt in a large mixing bowl until evenly combined.
- Transfer the mixture into your prepared pan and press it firmly into the bottom in an even layer.
- Bake for 10 to 12 minutes, or until the mixture is set and lightly golden.
- Remove the pan from the oven and immediately sprinkle the chocolate chips evenly over the warm base.
- Add small dollops of peanut butter over the chocolate chips if desired.
- Allow the chocolate to soften for a few minutes, then spread it into a smooth layer over the base.
- Chill in the refrigerator for at least 1 to 2 hours until the chocolate is firmly set.
- Lift the bars out of the pan using the parchment edges and cut them into squares or rectangles.
Notes
Store leftover bars in an airtight container at room temperature for up to a week, or in the refrigerator for up to two weeks.
Nutrition
- Serving Size: 1 bar
- Calories: 180
- Sugar: 9g
- Sodium: 80mg
- Fat: 9g
- Saturated Fat: 5g
- Unsaturated Fat: 4g
- Trans Fat: 0g
- Carbohydrates: 23g
- Fiber: 1g
- Protein: 2g
- Cholesterol: 30mg