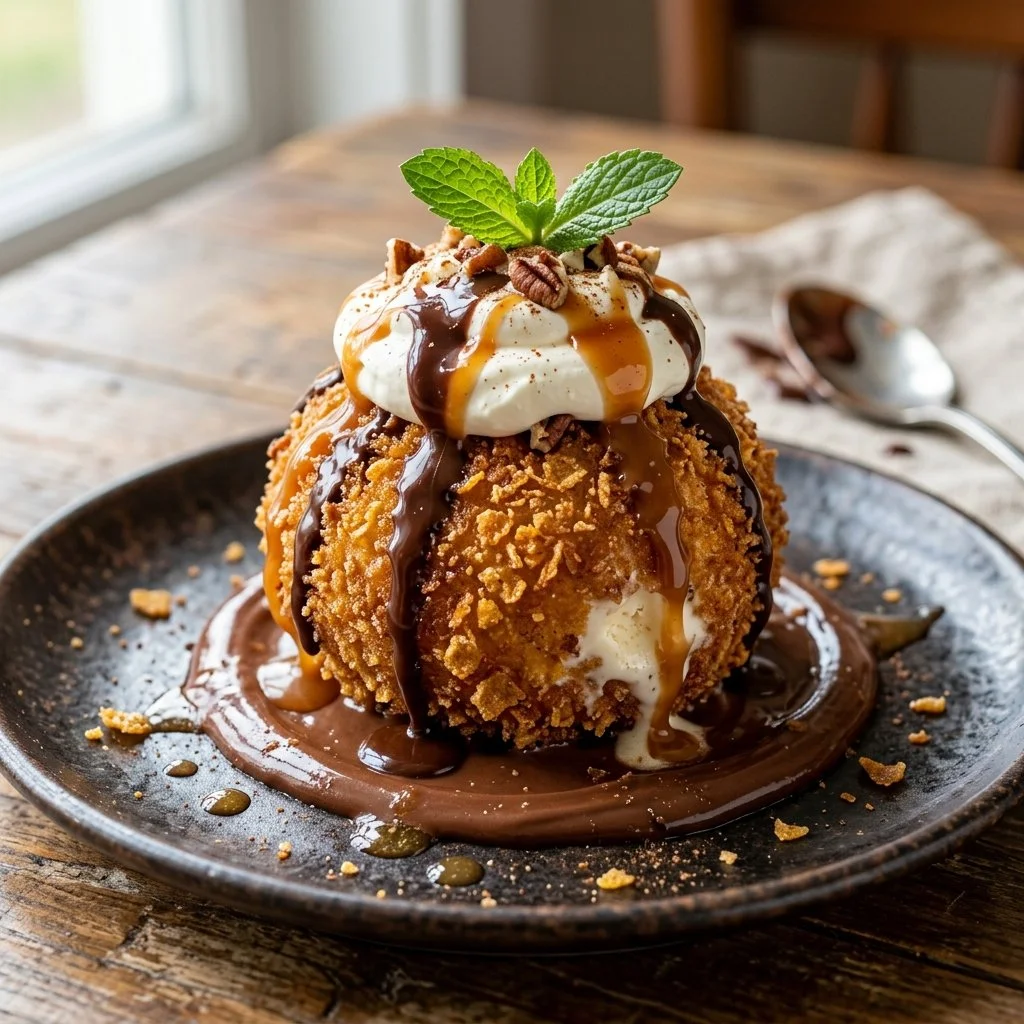
There’s something utterly magical about the juxtaposition of hot and cold that dances on the palate, and nothing embodies that delightful contrast quite like Fried Ice Cream. Imagine crispy, golden brown crust enveloping a cold, creamy scoop of vanilla ice cream—it’s a fun and unexpected treat that feels like a celebration with every bite. This recipe isn’t just a dish; it’s a trip down memory lane recalling nights spent at vibrant Mexican restaurants, wrapping up tantalizing meals with a dessert that never fails to dazzle.
Now, let me share a little secret of my own: the first time I tasted Fried Ice Cream, I was utterly captivated. It was one of those summers that seemed to stretch forever, sweetened by laughter and togetherness. I vividly remember the moment I took a bite; the crunch of the cornflakes gave way to the soothing, smooth ice cream, and the warmth of nostalgia washed over me. I knew then that this dish would become a cherished recipe in my home, perfect for impressing friends and family or just satisfying a sweet tooth.
## Recipe Timing
- Prep Duration: 2 hours 15 minutes
- Active Cooking: 15 minutes
- Total Duration: 2 hours 30 minutes
- Portion Size: Serves 4
- Complexity: Simple
## Nutritional Recipe
- Calories per portion: Approx. 350
- Protein: 5 g
- Carbs: 45 g
- Fats: 18 g
- Fiber: 1 g
- Sugars: 22 g
- Sodium: 210 mg
## Why You’ll Love This Fried Ice Cream
Fried Ice Cream is the perfect indulgence that combines simplicity and wow factor. It’s surprisingly easy to make but feels lavish and extraordinary. Whether you’re serving it at a bustling family gathering or a quiet dinner for two, this dessert is sure to steal the show. It also offers endless opportunities for adaptation, allowing you to personalize it with your favorite toppings. The sensation of hot and cold melds together, making each bite a little miracle of flavor and texture.
## The Complete Cooking Journey
Prepare yourself for a culinary adventure that only takes a couple of simple steps but yields unforgettable results. Dive into this delightful recipe, and turn an ordinary scoop of ice cream into a dazzling dessert your loved ones will rave about. Let’s get cooking!
## Ingredients:
- 1 quart vanilla ice cream
- 1 cup cornflakes
- 1 cup flour
- 2 eggs
- 1 tablespoon milk
- Oil for frying
- Chocolate syrup (for serving)
- Whipped cream (optional)
- Cherries (optional)
## Method:
Step 1: Scoop It Out
Scoop the ice cream into balls and freeze them for at least 2 hours. This step ensures that the ice cream is firm and holds its shape when you fry it, creating that delicious contrast.
Step 2: Crush the Crunch
Crush the cornflakes into small pieces and set them aside. You want them to be crumbs but not powder—this will give your ice cream the perfect crispy coating.
Step 3: Create the Batter
In a bowl, mix the flour, eggs, and milk to create a batter. This is where the magic begins, combining these simple ingredients to form a deliciously thick coating that will cling to your ice cream balls.
Step 4: Coat the Balls
Dip each ice cream ball into the batter, then roll it in the crushed cornflakes to coat. Make sure each ball is evenly covered for a consistent golden crust that will form during frying.
Step 5: Freeze Again
Freeze the coated ice cream balls for another hour. This additional freezing time helps to set the coating even further, making sure your fried ice cream stays together when you fry it.
Step 6: Heat the Oil
Heat oil in a deep fryer to 375°F (190°C). You want the oil hot enough to create that quick fry that browns the coating without melting the ice cream inside.
Step 7: Fry for Perfection
Fry each ball for about 10-15 seconds until golden brown. This quick fry is key—the goal is to achieve a crisp coating while ensuring the ice cream remains solid.
Step 8: Drain the Excess
Remove from oil and drain on paper towels. This helps eliminate any excess oil, keeping your dessert crispy and delightful.
Step 9: Serve with Love
Serve immediately with a drizzle of chocolate syrup, a dollop of whipped cream, and cherries on top if desired. This pretty presentation makes it feel like a special occasion on any day!
## Serving Suggestions & Pairings
Fried Ice Cream is excellent on its own, but why not take it up a notch? Consider pairing it with a warm fruit compote, sprinkling nuts for extra crunch, or creating a sundae bar with an array of toppings. A scoop of freshly made churros on the side would complement the dessert beautifully!
## Storage & Leftovers Guide
While it’s best enjoyed fresh, if you have any leftovers, store the fried ice cream in an airtight container in the freezer. It should last for up to 1 week, though the crispy coating may lose some of its crunch upon reheating.
## Kitchen Wisdom & Success Tips
- Chill Your Utensils: Keep your scooping tools and bowls chilled for easier handling of the ice cream.
- Temperature Matters: Make sure your oil is at the right temperature. A cooking thermometer can help guarantee success.
- Freeze Again: The longer you freeze after coating, the thicker and crunchier your final fry will be!
## Flavor Variations & Adaptations
This recipe is wonderfully flexible. Experiment by using different ice cream flavors like chocolate, strawberry, or even mint. For added fun, you can sprinkle ground cinnamon or cocoa in your cornflakes before crushing to introduce unique flavors.
## Reader Questions & Solutions
- What if my ice cream melts while I’m preparing?: Work quickly and keep your ice cream balls back in the freezer as needed. They should be sturdy enough for the coating.
- Can I use other cereals instead of cornflakes?: Absolutely! Consider using crushed graham crackers, Rice Krispies, or even finely chopped nuts for a fantastic twist.
- Is there a non-frying method?: You could bake them in an oven at 400°F (200°C) for about 10 minutes, but be aware that the texture will be different.
- How do I customize the coating?: Mix powdered sugar or sprinkles into your cornflakes for an extra sweet crunch!
- What type of oil should I use for frying?: Canola or vegetable oil works best due to their high smoke points and neutral flavors.
## Wrapping Up
Fried Ice Cream is not just a dessert; it’s an experience that brings joy and delight to anyone who gets a taste. Whether you’re creating lasting memories with family or indulging in a retro-inspired treat, this vibrant dessert captures the essence of celebration. So roll up your sleeves, toss on your apron, and take a plunge into this fantastic mix of temperatures and flavors. I promise, your efforts will be met with smiles and open hearts, and every bite will remind you of the joyous occasions celebrated around the dinner table. Happy cooking!
PrintFried Ice Cream
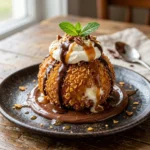
A fun and nostalgic dessert combining crispy golden crust with cold vanilla ice cream, perfect for impressing friends and family.
- Prep Time: 135 minutes
- Cook Time: 15 minutes
- Total Time: 150 minutes
- Yield: 4 servings 1x
- Category: Dessert
- Method: Frying
- Cuisine: Mexican
- Diet: Vegetarian
Ingredients
- 1 quart vanilla ice cream
- 1 cup cornflakes
- 1 cup flour
- 2 eggs
- 1 tablespoon milk
- Oil for frying
- Chocolate syrup (for serving)
- Whipped cream (optional)
- Cherries (optional)
Instructions
- Scoop the ice cream into balls and freeze them for at least 2 hours.
- Crush the cornflakes into small pieces and set them aside.
- Mix the flour, eggs, and milk to create a batter.
- Dip each ice cream ball into the batter, then roll it in the crushed cornflakes to coat.
- Freeze the coated ice cream balls for another hour.
- Heat oil in a deep fryer to 375°F (190°C).
- Fry each ball for about 10-15 seconds until golden brown.
- Remove from oil and drain on paper towels.
- Serve immediately with chocolate syrup, whipped cream, and cherries on top if desired.
Notes
Chill your utensils for easier handling of ice cream. Ensure the oil is at the right temperature for frying.
Nutrition
- Serving Size: 1 serving
- Calories: 350
- Sugar: 22g
- Sodium: 210mg
- Fat: 18g
- Saturated Fat: 10g
- Unsaturated Fat: 6g
- Trans Fat: 0g
- Carbohydrates: 45g
- Fiber: 1g
- Protein: 5g
- Cholesterol: 100mg