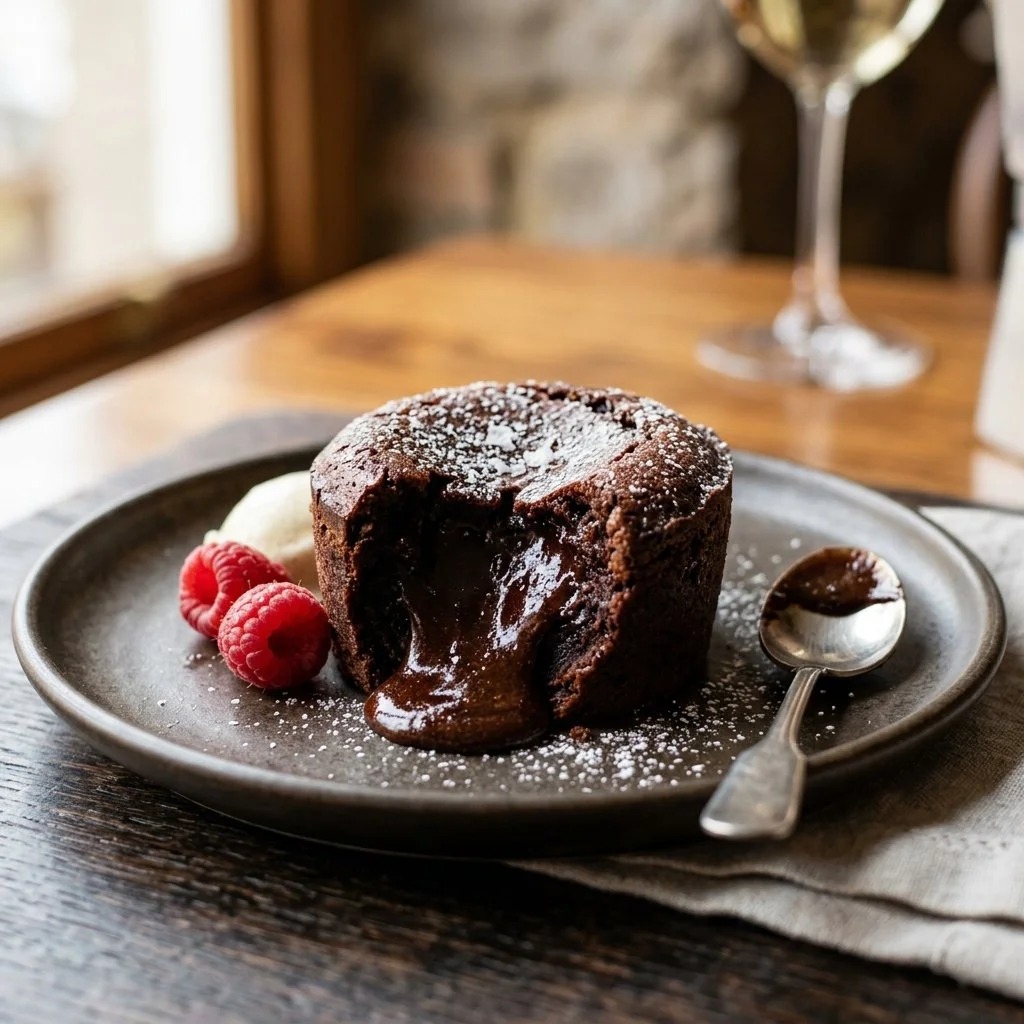
The scent of melted chocolate wafts through my kitchen, enveloping me like a warm hug on a chilly evening. It’s a comforting, familiar aroma that instantly reminds me of cozy family gatherings and special occasions celebrated over decadent desserts. Chocolate Lava Cake holds a special place in my heart and my collection of desserts, not just because it’s simply irresistible, but because it’s one of those last-minute showstoppers that never fails to impress. With its molten center and a crispy exterior, it’s a dessert that turns an ordinary dinner into an extraordinary feast.
Recipe Timing
- Prep Duration: 10 minutes
- Active Cooking: 14 minutes
- Total Duration: 24 minutes
- Portion Size: Serves 4
- Complexity: Simple
Nutritional Recipe
- Calories per portion: Approximately 300 calories
- Protein: 5 grams
- Carbs: 30 grams
- Fats: 18 grams
- Fiber: 1 gram
- Sugars: 20 grams
- Sodium: 150 mg
Why You’ll Love This Chocolate Lava Cake
Picture this: you slice into the soft, warm cake, and your fork pierces the delicate shell, releasing a river of molten chocolate that flows like a dream onto your plate. This Chocolate Lava Cake is not just a dessert; it’s an experience. Perfect for date nights, dinner parties, or even just a little self-indulgence, this simple yet exquisite cake will have your loved ones swooning with delight. And the best part? It’s quick to whip up! You’ll be crowned the dessert champion in no time!
The Complete Cooking Journey
Let’s dive into the beautiful experience of creating this luxurious Chocolate Lava Cake. Gather around as I guide you through each delectable step, highlighting the delightful process that turns simple ingredients into pure bliss.
Ingredients:
- 1/2 cup unsalted butter
- 1 cup semi-sweet chocolate chips
- 2 large eggs
- 2 large egg yolks
- 1/4 cup granulated sugar
- 2 tablespoons all-purpose flour
- 1 teaspoon vanilla extract
- Pinch of salt
Method:
Step 1: Preheat the Oven and Prepare Ramekins
Preheat the oven to 425°F (220°C). While it warms, grease and flour four ramekins, ensuring a smooth release for your lava cakes.
Step 2: Melt Butter and Chocolate
In a microwave-safe bowl or over a double boiler, melt the unsalted butter and semi-sweet chocolate chips together until smooth and glossy. This decadent mixture will be the magic that makes your cake so rich!
Step 3: Whisk Eggs and Sugar
In a mixing bowl, combine the eggs, egg yolks, and granulated sugar. Whisk them vigorously until the mixture becomes pale and fluffy, resembling a beautiful golden cloud. This step introduces air, creating a light texture in your cake.
Step 4: Incorporate the Chocolate Mixture
Gently stir the melted chocolate and butter mixture into the egg and sugar mix until combined. This luscious mixture is the heart of your lava cake, combining the richness of chocolate with the sweetness of sugar.
Step 5: Fold in Flour, Vanilla, and Salt
Carefully fold in the all-purpose flour, vanilla extract, and a pinch of salt. This is where the base of your lava cake comes together, tender yet robust enough to hold that molten center.
Step 6: Divide the Batter
Evenly divide the batter into the prepared ramekins, filling each about halfway. This is your masterpiece in the making, so don’t worry if they look a bit messy — they’ll transform beautifully in the oven.
Step 7: Bake to Perfection
Pop the filled ramekins into your preheated oven and bake for 12-14 minutes. You want the edges to be firm but the centers to be soft and gooey. It’s like waiting for a volcano to erupt — the excitement builds with each passing minute!
Step 8: Cool and Serve
Allow the cakes to cool for just 1 minute before carefully inverting them onto plates. Watch as the magic unfolds — the perfect lava flow awaits.
Serving Suggestions & Pairings
Serve your Chocolate Lava Cake warm with a dusting of powdered sugar and a scoop of vanilla ice cream or a dollop of whipped cream. Fresh berries like raspberries or strawberries complement the richness beautifully, adding a delightful tartness to each bite.
Storage & Leftovers Guide
If you happen to have any leftovers (which is rare), store them in an airtight container in the fridge for up to 2 days. The cakes can be reheated slightly in the microwave for a quick indulgence, though they are best enjoyed fresh out of the oven.
Kitchen Wisdom & Success Tips
- Room Temperature Ingredients: Always ensure your eggs are at room temperature for better incorporation.
- Don’t Overbake: Keep a close eye on your cakes as they bake; overbaking will result in less gooey centers.
- Experiment with Ramekins: Don’t have ramekins? You can use muffin tins for mini-lava cakes — just adjust the baking time.
Flavor Variations & Adaptations
Feel free to get creative! Add a splash of espresso for a mocha twist, incorporate orange zest for a citrusy flair, or experiment with flavored extracts like almond or mint. For a more decadent option, you can add a piece of chocolate or a dollop of Nutella to the center of each ramekin before baking for an extra explosion of flavor.
Reader Questions & Solutions
-
Can I make these ahead of time?
Yes! You can prepare the batter and refrigerate it for up to 24 hours. Just remember to bake directly after removing from the fridge! -
My cakes didn’t rise, what went wrong?
Over mixing the batter after adding the flour can lead to dense cakes. Mix gently to keep that airy texture. -
What if I don’t have ramekins?
You can use small oven-safe bowls or even muffin tins, but adjust your baking time accordingly. -
How can I tell when they’re done?
The edges should be set, with the center still slightly jiggly. Trust the timer but also use your eyes! -
Can I freeze these?
Yes, but it’s better to freeze the batter than the baked cake. You can bake from frozen; just add a couple of extra minutes to baking time.
Wrapping Up
There you have it — a decadent Chocolate Lava Cake recipe that promises to delight your senses and warm your heart. This dessert is not just about taste; it’s about creating memories and sharing love with every bite. So gather your ingredients, turn on the oven, and embark on this delightful culinary journey. Trust me; your taste buds will thank you! Enjoy every gooey, chocolaty moment.
PrintChocolate Lava Cake
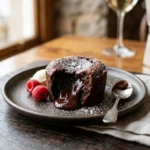
Indulge in the rich experience of Chocolate Lava Cake with a molten center and crispy exterior, perfect for any occasion.
- Prep Time: 10 minutes
- Cook Time: 14 minutes
- Total Time: 24 minutes
- Yield: 4 servings 1x
- Category: Dessert
- Method: Baking
- Cuisine: French
- Diet: Vegetarian
Ingredients
- 1/2 cup unsalted butter
- 1 cup semi-sweet chocolate chips
- 2 large eggs
- 2 large egg yolks
- 1/4 cup granulated sugar
- 2 tablespoons all-purpose flour
- 1 teaspoon vanilla extract
- Pinch of salt
Instructions
- Preheat the oven to 425°F (220°C) and prepare ramekins.
- Melt the unsalted butter and semi-sweet chocolate chips in a microwave-safe bowl or over a double boiler until smooth.
- Whisk together the eggs, egg yolks, and granulated sugar until pale and fluffy.
- Incorporate the melted chocolate mixture into the egg mixture until combined.
- Fold in the all-purpose flour, vanilla extract, and a pinch of salt.
- Divide the batter evenly among the prepared ramekins, filling each halfway.
- Bake in the preheated oven for 12-14 minutes until the edges are firm but centers remain soft.
- Cool for 1 minute, then invert onto plates to serve.
Notes
Serve warm with powdered sugar and a scoop of vanilla ice cream or whipped cream. Fresh berries enhance the experience.
Nutrition
- Serving Size: 1 serving
- Calories: 300
- Sugar: 20g
- Sodium: 150mg
- Fat: 18g
- Saturated Fat: 10g
- Unsaturated Fat: 8g
- Trans Fat: 0g
- Carbohydrates: 30g
- Fiber: 1g
- Protein: 5g
- Cholesterol: 150mg