
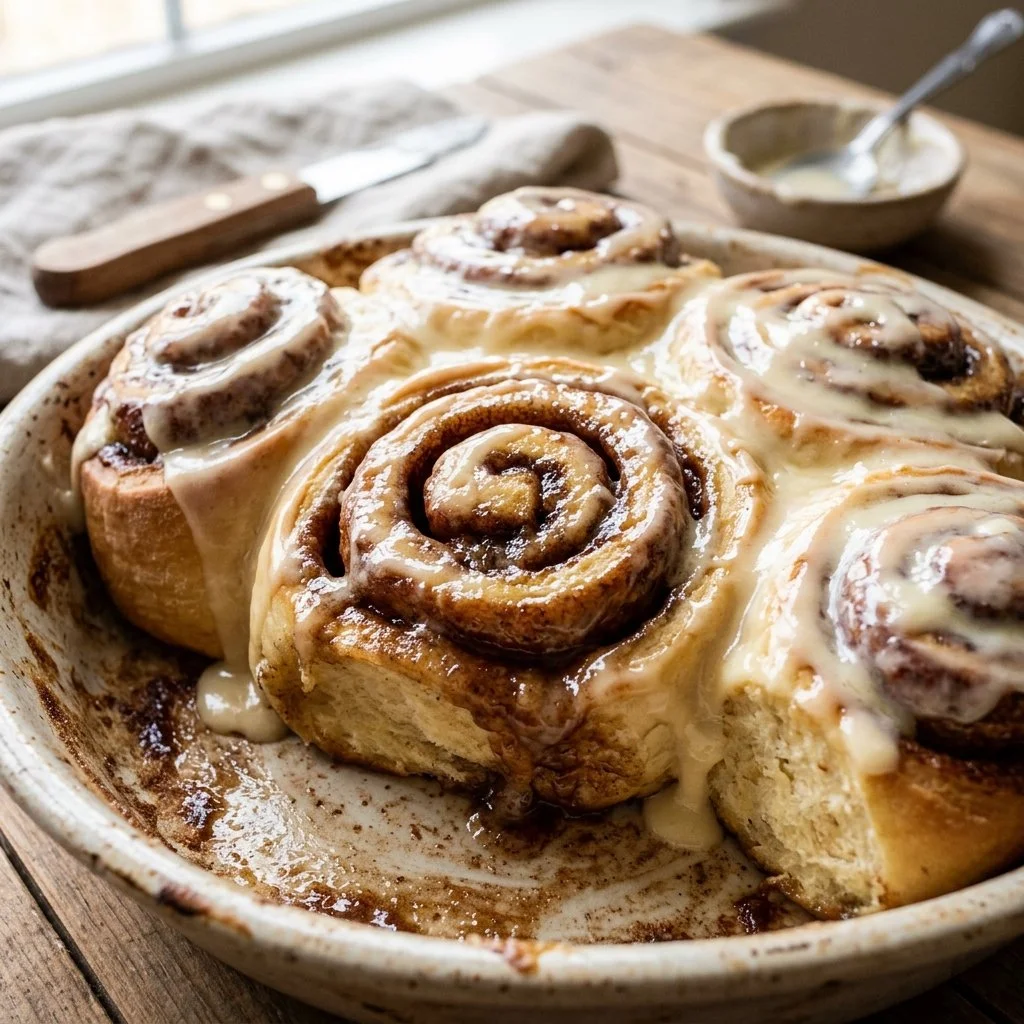
There’s a certain magic in the air when you decide to whip up a batch of homemade cinnamon rolls on a lazy weekend morning. As the aroma of sweet cinnamon and warm dough fills your kitchen, it transforms into a cozy sanctuary, inviting everyone to rise and shine. I remember the first time I made these delightful rolls—my boys woke up, their eyes lighting up in anticipation, and as they stumbled half-asleep into the kitchen, the smell alone made them smile. It wasn’t long before we were gathered around the table, tearing into those fluffy, gooey rolls together, leaving us with warm hearts and happy bellies.
Recipe Timing
- Prep Duration: 20 minutes
- Active Cooking: 30 minutes
- Total Duration: 2 hours (including rising time)
- Portion Size: 12 rolls
- Complexity: Simple
Nutritional Recipe
- Calories per portion: 300
- Protein: 5g
- Carbs: 45g
- Fats: 12g
- Fiber: 1g
- Sugars: 16g
- Sodium: 300mg
Why You’ll Love This Homemade Cinnamon Rolls
Homemade cinnamon rolls are not just a treat; they are an experience. With each bite, you’re greeted by the light, fluffy texture of the dough, the rich warmth of the cinnamon sugar filling, and the indulgent cream cheese frosting drizzled on top (if you choose, of course!). They are perfect for Sunday brunch, holiday gatherings, or just an ordinary day that deserves a little sweetness. Plus, their simplicity means you can easily memorize the steps and whip them up often!
The Complete Cooking Journey
Let’s embark on this delicious journey together—from mixing the ingredients to soaking in the warm, comforting flavors of cinnamon and sugar, and finally, to indulging in a roll (or two!). Cooking is an art, and baking is a science; luckily, we’ve got the perfect balance here!
Ingredients:
- 4 cups all-purpose flour
- 1/4 cup granulated sugar
- 2 1/4 teaspoons active dry yeast
- 1 teaspoon salt
- 1 cup milk
- 1/3 cup unsalted butter
- 2 large eggs
- 1/2 cup brown sugar
- 2 tablespoons ground cinnamon
- 1/4 cup unsalted butter (for filling)
- Cream cheese frosting (optional)
Method:
Step 1: Mix the Dry Ingredients
In a bowl, mix together flour, sugar, yeast, and salt. This will create the base of your cinnamon roll dough, ensuring that all ingredients blend seamlessly.
Step 2: Heat the Milk and Butter
Heat milk and butter until warm (not boiling), then add to the dry ingredients along with the eggs. The warmth stimulates the yeast and brings your dough to life.
Step 3: Knead the Dough
Knead the dough until smooth and elastic, about 5-7 minutes. This is where the magic happens—get those muscles working and feel the dough transform!
Step 4: Let It Rise
Once kneaded, let the dough rise in a warm place for about 1 hour, or until it has doubled in size. This is a great time to sip on a cup of coffee while you wait!
Step 5: Roll Out the Dough
After the dough has risen, roll it out on a floured surface until it’s about 1/4 inch thick. Spread with softened butter, then sprinkle brown sugar and cinnamon over the top.
Step 6: Roll and Slice
Carefully roll up the dough tightly from one end to the other, then cut the roll into slices—about 12 should do. These will be your delicious rolls!
Step 7: Let Them Rise Again
Place the sliced rolls in a greased baking dish and let them rise again for 30-45 minutes. This second rise is crucial for fluffy rolls.
Step 8: Bake to Perfection
Preheat your oven to 350°F (175°C) and bake the rolls for 25-30 minutes, or until golden brown. Your kitchen will be filled with an irresistible scent!
Optional Step 9: Frost the Rolls
Once cooled, drizzle with cream cheese frosting for an extra touch of sweetness. Don’t skip this part—it adds a lovely layer of decadence!
Serving Suggestions & Pairings
These cinnamon rolls shine on their own, but why not pair them with a warm cup of coffee or a chai latte? They also complement fresh berries or a light fruit salad beautifully.
Storage & Leftovers Guide
Leftover cinnamon rolls can be stored in an airtight container at room temperature for up to 2 days or in the refrigerator for about a week. To warm them up, just pop them in the microwave for 20 seconds!
Kitchen Wisdom & Success Tips
- Kneading: Don’t rush the kneading step. It helps develop gluten, which gives the rolls their fluffy texture.
- Rising: If your kitchen is cold, preheat your oven to 200°F (93°C) for a few minutes, then turn it off and place your dough inside to rise.
- Measuring flour: Spoon flour into a measuring cup and level it off for accurate measurement. Too much flour can lead to dense rolls.
Flavor Variations & Adaptations
Feeling daring? Try adding nuts, dried fruits, or even a splash of vanilla extract to your dough. For a chocolatey twist, fold cocoa powder into your filling!
Reader Questions & Solutions
-
Q: Can I use instant yeast instead of active dry yeast?
A: Yes! Use the same amount and skip the proofing step. Just mix it directly with the dry ingredients. -
Q: What if my dough doesn’t rise?
A: Make sure your yeast is fresh! If it fails to activate, the dough won’t rise. You can also try placing it in a warmer location. -
Q: Can I freeze cinnamon rolls?
A: Absolutely! Freeze the sliced rolls before their second rise. When you’re ready to bake, allow them to thaw in the fridge overnight and then let them rise before baking. -
Q: How can I make these dairy-free?
A: Substitute the milk with almond or soy milk and use dairy-free butter for a delicious alternative. -
Q: Can I double this recipe?
A: Yes! Just be sure to use a larger bowl for mixing and allow for extra rising time as needed.
Wrapping Up
Now that you have all the tools you need to create these delightful homemade cinnamon rolls, it’s your turn! I hope you’ll find joy in each step of the process, and that these rolls turn into treasured memories for you and your loved ones. So, roll up your sleeves, and let’s get baking!
PrintHomemade Cinnamon Rolls

Fluffy homemade cinnamon rolls perfect for cozy mornings and family gatherings.
- Prep Time: 20 minutes
- Cook Time: 30 minutes
- Total Time: 120 minutes
- Yield: 12 servings 1x
- Category: Dessert
- Method: Baking
- Cuisine: American
- Diet: Vegetarian
Ingredients
- 4 cups all-purpose flour
- 1/4 cup granulated sugar
- 2 1/4 teaspoons active dry yeast
- 1 teaspoon salt
- 1 cup milk
- 1/3 cup unsalted butter
- 2 large eggs
- 1/2 cup brown sugar
- 2 tablespoons ground cinnamon
- 1/4 cup unsalted butter (for filling)
- Cream cheese frosting (optional)
Instructions
- Mix the dry ingredients: In a bowl, mix together flour, sugar, yeast, and salt.
- Heat the milk and butter: Heat milk and butter until warm (not boiling), then add to the dry ingredients along with the eggs.
- Knead the dough: Knead the dough until smooth and elastic, about 5-7 minutes.
- Let it rise: Once kneaded, let the dough rise in a warm place for about 1 hour, or until it has doubled in size.
- Roll out the dough: After the dough has risen, roll it out on a floured surface until it’s about 1/4 inch thick.
- Roll and slice: Carefully roll up the dough tightly from one end to the other, then cut the roll into slices—about 12 should do.
- Let them rise again: Place the sliced rolls in a greased baking dish and let them rise again for 30-45 minutes.
- Bake to perfection: Preheat your oven to 350°F (175°C) and bake the rolls for 25-30 minutes.
- Frost the rolls: Once cooled, drizzle with cream cheese frosting for an extra touch of sweetness.
Notes
For best results, do not rush the kneading step and ensure your yeast is fresh for proper rising.
Nutrition
- Serving Size: 1 roll
- Calories: 300
- Sugar: 16g
- Sodium: 300mg
- Fat: 12g
- Saturated Fat: 7g
- Unsaturated Fat: 5g
- Trans Fat: 0g
- Carbohydrates: 45g
- Fiber: 1g
- Protein: 5g
- Cholesterol: 30mg