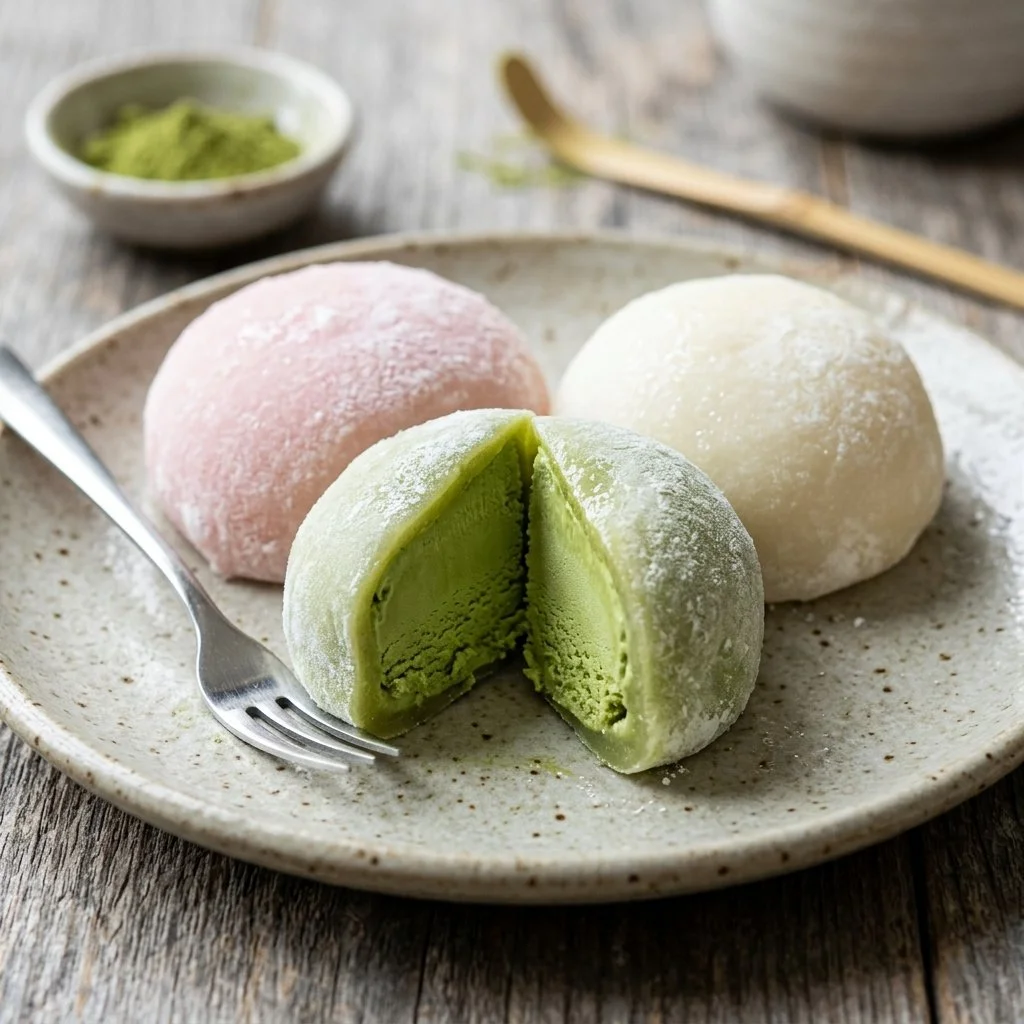
Mochi ice cream has a special place in my heart. I remember the first time I bit into a perfectly chewy piece, enveloping a creamy scoop of vanilla ice cream. It was like a burst of joy in my mouth, a delightful contrast between the sticky mochi and the cold, luscious ice cream. As someone who appreciates both texture and flavor, mochi ice cream is a masterpiece that combines both in a blissful partnership. Today, I’m excited to share this simple yet rewarding recipe that will elevate your dessert game and impress family and friends alike.
Recipe Timing
- Prep Duration: 15 minutes
- Active Cooking: 6 minutes
- Total Duration: 1 hour 21 minutes (including freezing time)
- Portion Size: Makes about 8 pieces
- Complexity: Simple
Nutritional Recipe
- Calories per portion: Approximately 120
- Protein: 1g
- Carbs: 23g
- Fats: 1.5g
- Fiber: 0g
- Sugars: 10g
- Sodium: 10mg
Why You’ll Love This Mochi Ice Cream
If you’re looking for a dessert that is not only unique but also impressively easy to make at home, you’re in for a treat! Mochi ice cream combines the delightful chewiness of sweet rice flour with the creamy goodness of ice cream. It’s a fun treat to prepare and share, perfect for summer gatherings, birthday parties, or just a sweet indulgence for yourself. Plus, the beauty of mochi ice cream lies in its versatility; you can fill it with any flavor of ice cream you adore, whether it’s classic chocolate or adventurous green tea.
The Complete Cooking Journey
Let’s embark on this delightful journey to craft mochi ice cream that will surely be the star of your dessert table. Gather your ingredients, roll up your sleeves, and let’s make some magic happen!
Ingredients:
- 1 cup sweet rice flour (mochi flour)
- 1/4 cup sugar
- 1 cup water
- Cornstarch (for dusting)
- Ice cream (your choice of flavor)
Method:
Step 1: Combine Ingredients
In a bowl, combine sweet rice flour and sugar. This will create a sweet base, ready for its transformation.
Step 2: Mix with Water
Gradually add water and mix until smooth. The mixture should have a thin, pancake-like consistency.
Step 3: Prepare for Microwaving
Pour the mixture into a microwave-safe dish and cover it with plastic wrap to prevent spattering.
Step 4: Initial Cooking
Microwave for 1 minute, stirring halfway through. This initial heat begins to cook the flour, yielding a slightly gelatinous texture.
Step 5: Continue Heating
Stir again and microwave for another minute. The mochi will become more solid and cohesive.
Step 6: Final Cooking
Stir one more time, then microwave for an additional 30 seconds. At this point, you’ll notice the mixture is glossy and sticky—this is what you want!
Step 7: Dust and Cool
Dust a clean surface with cornstarch and pour the mochi mixture onto it. Be careful, as it will be hot! Once on the surface, dust more cornstarch over the top.
Step 8: Portion and Shape
Once cool, cut the mochi into squares. Use a sharp knife dusted with cornstarch to avoid sticking.
Step 9: Final Assembly
Flatten each square and wrap it around a scoop of ice cream. It’s okay if it’s not perfect; this adds to the charm!
Step 10: Freeze
Freeze for at least an hour before serving. This step helps the mochi firm up around the ice cream, making for a wonderful bite.
Serving Suggestions & Pairings
Serve your homemade mochi ice cream with a drizzle of chocolate sauce, fresh fruit, or a sprinkle of matcha powder for added flavor. You can also create a fun dessert platter with a variety of ice cream flavors for a flavor party that guests can’t resist!
Storage & Leftovers Guide
Mochi ice cream can be stored in an airtight container in the freezer for up to two weeks. Just keep in mind that the longer it sits, the more the texture may change. So, it’s best enjoyed fresh!
Kitchen Wisdom & Success Tips
- Make sure to dust your hands and the working surface with cornstarch to prevent sticking.
- If you find the mochi too sticky, it could be because it was undercooked; ensure that you follow the microwaving steps carefully.
- Experiment with flavors! Besides traditional ice cream, consider trying sorbets or gelato for a different texture and taste.
Flavor Variations & Adaptations
Experiment with different ice cream flavors such as mango, red bean, or even a zesty lemon sorbet! For the mochi itself, consider adding flavored extracts like coconut or almond to switch it up.
Reader Questions & Solutions
-
Q: Can I use regular rice flour instead of sweet rice flour?
A: Sweet rice flour is essential for achieving that signature chewy texture, so it’s best to stick with it for authentic mochi. -
Q: How do I prevent the mochi from sticking to my hands?
A: Dust your hands with cornstarch before handling the mochi; this significantly reduces stickiness. -
Q: Can I use any ice cream flavor?
A: Absolutely! The sky’s the limit. Get creative with your favorite flavors! -
Q: How long does the mochi ice cream last in the freezer?
A: It typically stays good for about two weeks, but for the best flavor and texture, enjoy it fresh within a few days. -
Q: What if my mochi is too thick?
A: If it’s too thick, try adding a little more water to the initial mixture. A thinner batter yields a softer mochi.
Wrapping Up
Making mochi ice cream is not just about crafting a delightful dessert; it’s about creating moments of joy with every bite. Whether enjoying it on a hot summer day or sharing it with loved ones, this recipe invites you to explore and indulge. So roll up your sleeves and have fun with this cheery concoction. It’s time to create something special in your kitchen—you’ve totally got this!