There’s something truly magical about a dessert that instantly transports you back to simpler times, filled with laughter, sunshine, and the comforting embrace of home. For me, that dessert is Magnolia Bakery’s famed Banana Pudding. A sweet treat that has cemented its place in my heart and with many, it echoes memories of backyard barbecues and family gatherings where every spoonful brings a smile. With velvety layers that combine creamy pudding, ripe bananas, and crunchy vanilla wafers, this indulgent dessert is almost too good to be true. And the best part? You can bring this iconic taste of nostalgia right into your kitchen!
## Recipe Timing
- Prep Duration: 20 minutes
- Active Cooking: 10 minutes
- Total Duration: 4 hours 30 minutes (including chill time)
- Portion Size: Serves 6-8
- Complexity: Simple
## Nutritional Recipe
- Calories per portion: Approximately 320 calories
- Protein: 4 grams
- Carbs: 42 grams
- Fats: 16 grams
- Fiber: 1 gram
- Sugars: 18 grams
- Sodium: 140 mg
## Why You’ll Love This Magnolia Bakery Banana Pudding
This classic dessert is a celebration of simple ingredients that come together to create something extraordinary. With its rich, creamy texture and the delightful contrast of the soft bananas and crunchy wafers, every layer is a delightful experience. Not to mention, the nostalgia associated with it—watching your loved ones’ faces light up when they take that first spoonful is priceless. Whether it’s a summer picnic or a cozy family dinner, this dessert is a showstopper that invites smiles and seconds!
## The Complete Cooking Journey
The journey of making Magnolia Bakery Banana Pudding starts with gathering the simplest of ingredients and ends with a chilled dessert that’s well worth the wait. Let’s dive into the details!
## Ingredients:
- 1 box vanilla wafers
- 4 ripe bananas, sliced
- 1 cup milk
- 1 cup heavy cream
- 1/2 cup sugar
- 1 teaspoon vanilla extract
- 3 tablespoons cornstarch
- 1/4 teaspoon salt
- 3 large egg yolks
## Method:
### Step 1: Mix the Creamy Base
In a bowl, mix together the milk, heavy cream, sugar, vanilla extract, cornstarch, salt, and egg yolks. Whisk until the ingredients are well combined and smooth.
### Step 2: Cook the Mixture
Transfer your mixture to a saucepan and cook over medium heat, stirring constantly. As the heat works its magic, the mixture will start to thicken—this is what we want for that luscious pudding texture!
### Step 3: Cool It Down
Once thickened, remove the saucepan from heat. It’s time to let this creamy goodness cool slightly. You can leave it in the pan or transfer it to a bowl, but allow it to cool at room temperature.
### Step 4: Layer the Goodness
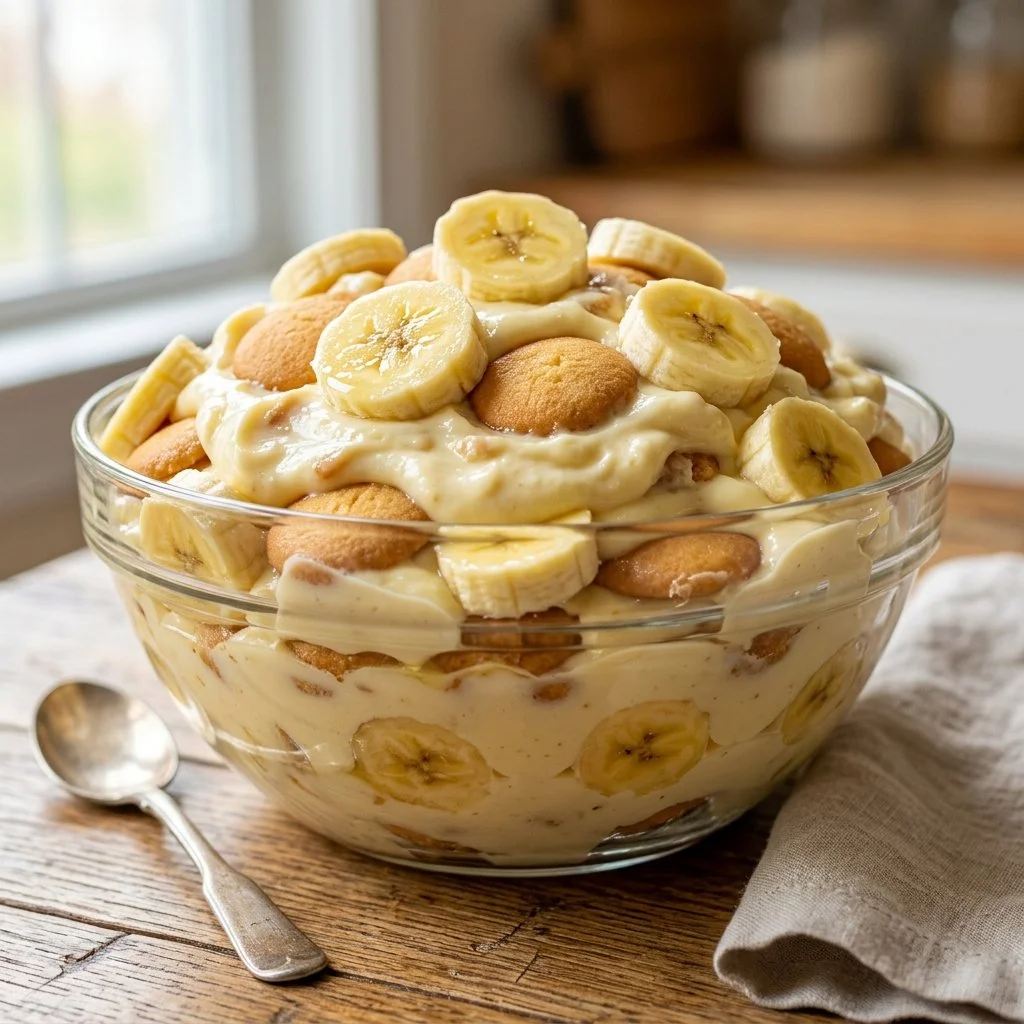
In a serving dish, start layering by placing a layer of vanilla wafers at the bottom, followed by a layer of sliced bananas, and then a generous layer of your pudding mixture.
### Step 5: Repeat the Layers
Continue layering with vanilla wafers, bananas, and pudding until all the ingredients are used up. The final layer should end with the creamy pudding topping off the layers.
### Step 6: Chill Before Serving
Cover your creation and place it in the refrigerator for at least 4 hours. This chilling time allows the flavors to meld beautifully, and the pudding sets just right.
## Serving Suggestions & Pairings
This Banana Pudding is perfect on its own, but why not elevate the experience? Serve with a dollop of freshly whipped cream, sprinkle a pinch of crushed vanilla wafers on top for extra crunch, or pair it with a steaming cup of coffee or a glass of sweet iced tea. It’s a fantastic finish to any meal!
## Storage & Leftovers Guide
If you’re fortunate enough to have leftovers (which is rare with this dessert!), cover your Banana Pudding tightly with plastic wrap and store it in the refrigerator. It’s best enjoyed within 2-3 days. However, I promise you, it won’t last long!
## Kitchen Wisdom & Success Tips
- Ripe Bananas: Use bananas that are just ripe enough for flavor without being overly mushy.
- Whisking: Ensure thorough whisking in Step 1 to prevent any lumps in your pudding.
- Layer Technique: For a beautiful presentation, arrange the top layer of bananas in an artistic manner.
- Cooling Process: Rapid cooling can lead to a skin forming on your pudding; if desired, cover it with plastic wrap directly on the surface while it cools.
## Flavor Variations & Adaptations
Feel free to make this recipe your own! Throw in a handful of chocolate chips, swap vanilla wafers for ginger snaps for a spicy twist, or even add a berry layer with strawberries or blueberries between the puddings. The possibilities are endless!
## Reader Questions & Solutions
-
Can I make this gluten-free?
Absolutely! Just substitute the vanilla wafers with a gluten-free version. -
What if I don’t have heavy cream?
You can use whole milk instead, though the pudding may not be as rich. -
Can I use non-dairy substitutes?
Yes! Almond milk or coconut cream works wonderfully in this recipe. -
How can I tell when the pudding is thick enough?
The pudding should coat the back of a spoon and leave a line when you run your finger through it. -
Can I freeze the banana pudding?
Freezing is not advised, as the bananas can change texture once thawed. Better to enjoy it fresh!
## Wrapping Up
There you have it—an unforgettable Magnolia Bakery Banana Pudding that’s not only easy to make but also a delightful addition to any occasion. So roll up your sleeves and create your own slice of happiness with this recipe. Remember, the joy of cooking comes not just from what you make, but the love and laughter that fills your kitchen and home. Happy pudding-making, friends!