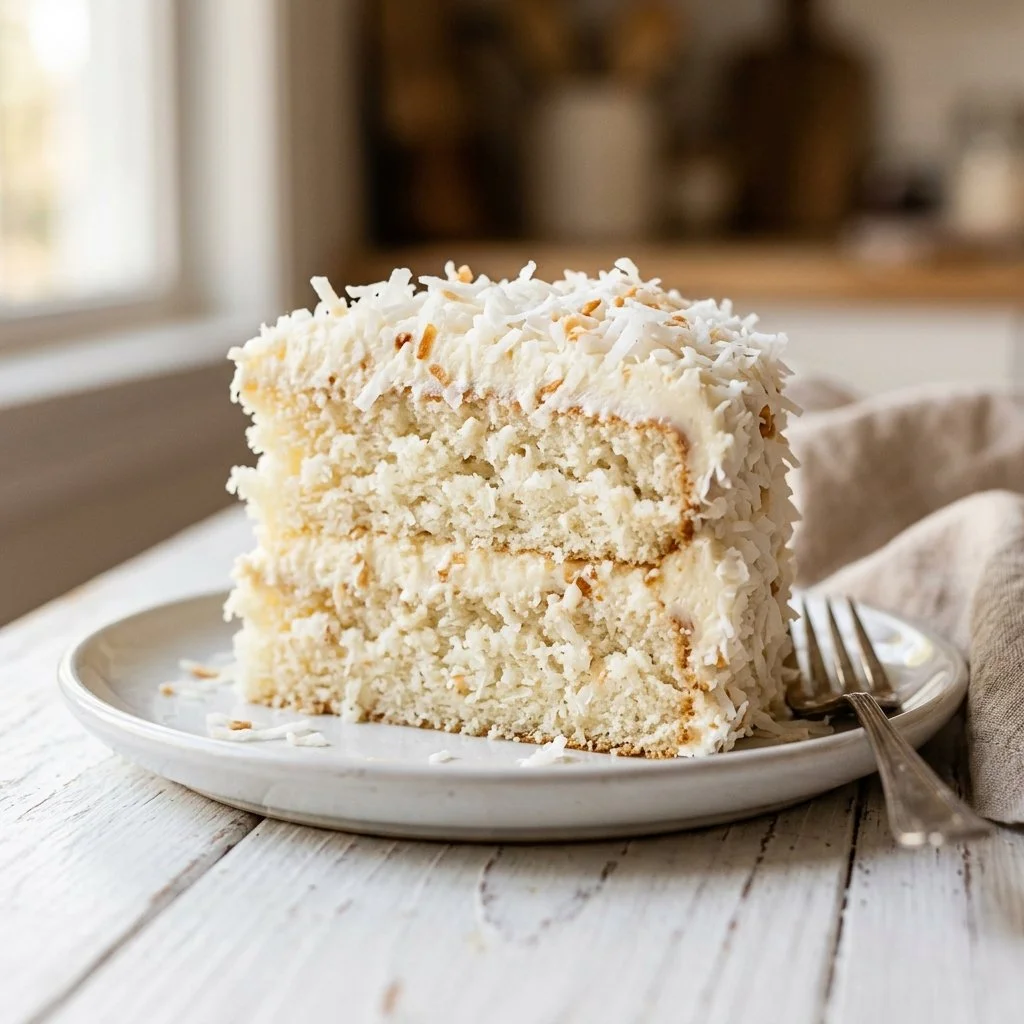
One of my fondest childhood memories is being enveloped in a comforting cloud of sweet, buttery aroma wafting through the kitchen. It was my grandmother’s coconut cake, the star of her dessert repertoire. The moment that first slice was served, our family would gather around, forks at the ready, hearts aflutter with anticipation. Each bite was a delicious escape to a tropical paradise, each forkful laden with the warmth of love and tradition. Today, I want to share this cherished recipe with you, inviting you to recreate that experience in your own home.
Recipe Timing
- Prep Duration: 15 minutes
- Active Cooking: 30 minutes
- Total Duration: 45-60 minutes
- Portion Size: Serves 8
- Complexity: Simple
Nutritional Recipe
- Calories per portion: Approximately 350
- Protein: 5 grams
- Carbs: 50 grams
- Fats: 15 grams
- Fiber: 1 gram
- Sugars: 30 grams
- Sodium: 200 mg
Why You’ll Love This Coconut Cake
Imagine silken layers of cake, velvety and moist, with the luscious, tropical sweetness of coconut dancing across your taste buds. The creamy notes of coconut milk bring a delightful richness, while a sprinkle of shredded coconut adds a delightful texture. This cake is not just a dessert; it’s a celebration! Birthdays, potlucks, or just an afternoon pick-me-up — this coconut cake is the perfect companion. It encapsulates the sunshine of summer in every bite, providing a sweet escape no matter the season.
The Complete Cooking Journey
Creating this coconut cake is not just about mixing ingredients; it’s about reliving memories and forging new ones. Each step takes you closer to that beautiful centerpiece for your next gathering. As you cream together the butter and sugar, you’ll feel the excitement build. The simple act of folding in flour awakens the baker in you, connecting you to generations of family cooks who cherished this same recipe. Baking is a sensory experience, and with each fragrant whiff, you’ll be transported into a world of sweet indulgence.
Ingredients:
- 2 cups all-purpose flour
- 1 cup granulated sugar
- 1 cup unsweetened shredded coconut
- 1/2 cup unsalted butter, softened
- 1 cup milk
- 3/4 cup coconut milk
- 3 large eggs
- 1 tablespoon baking powder
- 1 teaspoon vanilla extract
- 1/2 teaspoon salt
Method:
Step 1: Preheat the Oven
Preheat the oven to 350°F (175°C). Grease and flour two 9-inch round cake pans to ensure your cakes glide out smoothly once they’re baked.
Step 2: Cream the Butter and Sugar
In a large bowl, cream together the softened butter and granulated sugar until light and fluffy. This step is key to achieving a light texture in your cake!
Step 3: Add the Eggs
Add eggs one at a time, mixing well after each addition. This helps to incorporate air into the mixture, making the cake rise beautifully.
Step 4: Combine Wet Ingredients
Mix in the vanilla extract, milk, and coconut milk. The combination of milks enhances the coconut flavor and adds moisture.
Step 5: Whisk Dry Ingredients
In a separate bowl, whisk together the flour, baking powder, salt, and shredded coconut. This step ensures even distribution of the baking powder, which helps the cake rise.
Step 6: Combine Wet and Dry Mixtures
Gradually add the dry ingredients to the wet mixture, stirring until just combined. Be careful not to overmix; a few lumps are perfectly fine.
Step 7: Divide the Batter
Divide the batter evenly between the prepared pans, ensuring they bake evenly and rise at the same rate.
Step 8: Bake the Cakes
Bake in the preheated oven for 25-30 minutes or until a toothpick inserted in the center comes out clean. Keep an eye on them — the aroma will be irresistible!
Step 9: Cool the Cakes
Allow the cakes to cool in the pans for 10 minutes, then transfer to wire racks to cool completely. This step is important to prevent soggy bottoms and to preserve that fluffy texture.
Serving Suggestions & Pairings
This coconut cake is delightful on its own, but feel free to elevate the experience! A dollop of whipped cream or a scoop of coconut ice cream on the side can make it even more indulgent. Pair it with a fruity tropical drink, like a piña colada or a refreshing iced tea, to enhance those island vibes.
Storage & Leftovers Guide
Store any leftover coconut cake in an airtight container at room temperature for up to three days, or in the fridge for up to a week. If you want to keep it longer, you can freeze it for up to three months! Just wrap it well in plastic wrap and foil, and be sure to thaw in the fridge overnight before serving.
Kitchen Wisdom & Success Tips
- Make sure your ingredients are at room temperature for better mixing.
- Use a baking scale for precise measurements, which can make a difference in cakes.
- If you want to add a little more flair, consider incorporating a coconut frosting or a lemon glaze for a zesty twist.
- Always check your cake a few minutes before the suggested baking time to prevent overbaking.
Flavor Variations & Adaptations
If you want to mix it up, consider adding lime zest for a citrusy brightness or even chocolate chips for a fun, sweet surprise. You could also substitute the shredded coconut with crushed pineapple for a layered tropical effect.
Reader Questions & Solutions
-
How do I make sure my cake doesn’t stick to the pan?
Grease and flour your pans well, or use parchment paper for added protection. -
Can I use sweetened shredded coconut?
While the recipe calls for unsweetened, you can use sweetened coconut—just be mindful to adjust the sugar in the recipe as per your taste. -
What if my cake comes out dry?
Check your oven temperature with a thermometer as ovens can vary. Also, make sure not to overmix the batter. -
How do I know when my cake is done?
Look for a golden color, and use the toothpick test: if it comes out clean, your cake is ready! -
Can I make this gluten-free?
Yes! Substitute all-purpose flour with a gluten-free blend, but be sure to check for a blend that includes xanthan gum.
Wrapping Up
There’s something undeniably special about baking a cake that fills your home with warmth and sweet aromas. This coconut cake will not only satisfy your sweet tooth but also evoke fond memories and create new ones around the dinner table. I encourage you to give it a try and see for yourself why it’s a cherished recipe in so many hearts. Happy baking, and may every slice bring you joy!