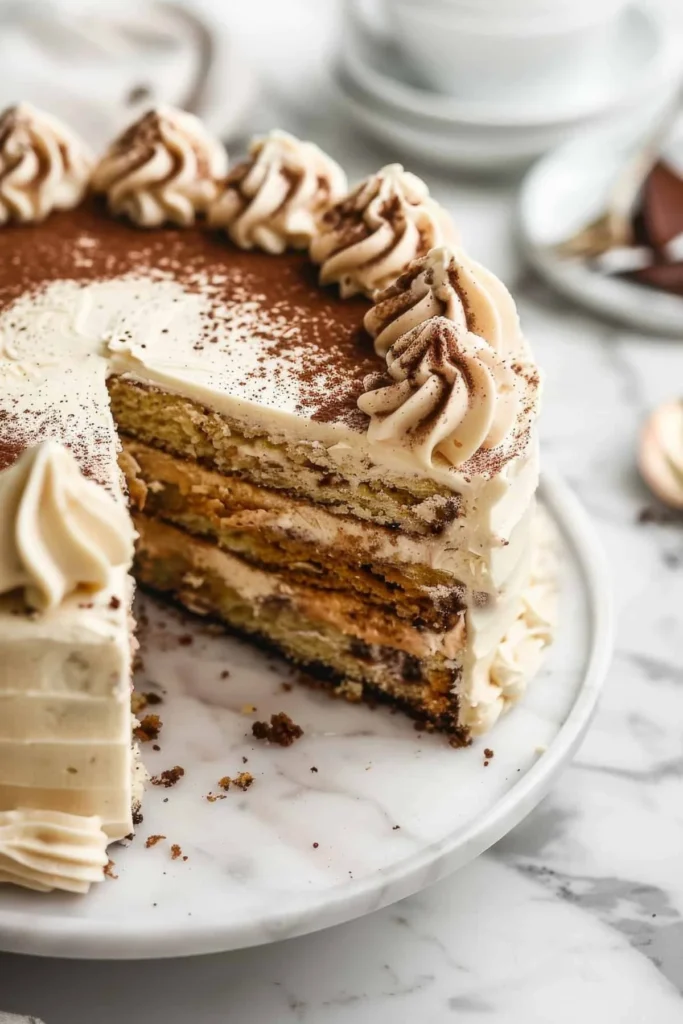
As I stood in my cozy kitchen, the tantalizing aroma of fresh coffee wafted through the air, wrapping me in warmth and nostalgia. It reminded me of lazy Sunday afternoons spent with family, gathered around the table, laughing and savoring sweet delights over home-brewed cups of joy. Among those treasured moments, nothing has captured my heart quite like the classic Tiramisu Cake. This delectable dessert, with its layers of creamy mascarpone and delicate ladyfingers dipped in coffee, has a way of turning any ordinary gathering into an extraordinary celebration.
Whether it’s a weekend dinner party or a simple weeknight treat, this Italian classic has become my go-to recipe for sharing happiness and indulgence. Let’s embark on this delightful culinary journey together and create a dessert that your loved ones will talk about for years to come!
Recipe Timing
- Prep Duration: 20 minutes
- Active Cooking: 15 minutes
- Total Duration: 4 hours (plus chilling time)
- Portion Size: Serves 12
- Complexity: Simple
Nutritional Recipe
- Calories per portion: Approx. 300
- Protein: 5 grams
- Carbs: 30 grams
- Fats: 18 grams
- Fiber: 0 grams
- Sugars: 14 grams
- Sodium: 75 mg
Why You’ll Love This Classic Tiramisu Cake
Tiramisu is not just a dessert; it’s an experience that transports you straight to an Italian café. Each spoonful offers a harmonious blend of flavors—rich mascarpone playing beautifully with the bold, aromatic coffee and the subtle sweetness of sugar, all encased in soft ladyfingers. Plus, it’s remarkably simple to make, yet it impressively elevates any occasion. There’s something magical about watching this dessert come together, and you’ll find it hard to resist sneaking just one more slice!
The Complete Cooking Journey
Ingredients:
- 3 cups strong brewed coffee, cooled
- 1 cup sugar
- 2 cups mascarpone cheese
- 1 cup heavy cream
- 1 teaspoon vanilla extract
- 36 ladyfinger cookies
- Cocoa powder for dusting
- Dark chocolate shavings (optional)
Method:
Step 1: Combine Coffee and Sugar
In a mixing bowl, combine the cooled coffee and sugar, stirring until the sugar is completely dissolved. This fragrant mixture will serve as the perfect foundation for your tiramisu.
Step 2: Prepare the Mascarpone
In another bowl, beat the mascarpone cheese until smooth. This creamy mixture will become the heart and soul of your dessert.
Step 3: Whip the Cream
In a separate bowl, whip heavy cream and vanilla extract together until soft peaks form. This step adds volume and lightness to your tiramisu.
Step 4: Fold the Mixtures
Carefully fold the whipped cream into the mascarpone mixture, ensuring a gentle incorporation that keeps the texture fluffy and airy.
Step 5: Dip the Ladyfingers
Quickly dip each ladyfinger into the coffee mixture, being careful not to soak them. You want them soft enough to absorb flavor, but firm enough to hold their shape.
Step 6: Layer the Dessert
Layer half of the dipped ladyfingers in a baking dish, creating a sturdy base. Then, spread half of the mascarpone mixture over the top, smoothing it with a spatula.
Step 7: Repeat the Layers
Repeat the process with the remaining ladyfingers and mascarpone, finishing with a luxurious layer of mascarpone.
Step 8: Chill and Set
Cover the dish and refrigerate the tiramisu for at least 4 hours or overnight. This chilling time allows the flavors to meld beautifully and the dessert to set.
Step 9: Dust and Garnish
Before serving, dust the top with cocoa powder and add chocolate shavings if desired, elevating the presentation and adding an extra touch of indulgence.
Serving Suggestions & Pairings
Tiramisu is perfect on its own, but why not pair it with a rich espresso or a scoop of velvety vanilla ice cream? For a festive touch, serve with fresh berries or a drizzle of caramel sauce. If you’re feeling adventurous, try serving it alongside a fruity dessert wine to enhance those coffee notes.
Storage & Leftovers Guide
Store any leftovers in the refrigerator, tightly covered, for up to 3 days. However, I bet it won’t last that long! Tiramisu is best enjoyed fresh, but the flavors do deepen beautifully after a day of chilling.
Kitchen Wisdom & Success Tips
- Coffee Concentration: Make sure your coffee is strong! The bolder the flavor, the more nostalgic your tiramisu will taste.
- Don’t Soak the Ladyfingers: A quick dip is all they need. Too much time in the coffee can lead to soggy layers.
- Airy Mascarpone: Be gentle when folding the whipped cream into the mascarpone to keep that airy texture.
Flavor Variations & Adaptations
Feel free to experiment with flavorings. A splash of coffee liqueur can elevate the sophistication, or you can try flavored extracts such as almond or hazelnut. If you want a lighter version, consider using Greek yogurt instead of mascarpone for a tangier twist.
Reader Questions & Solutions
- Can I use decaf coffee? Absolutely! For those sensitive to caffeine, decaf coffee works well and retains the dessert’s delicious flavor.
- What if I can’t find ladyfingers? You can substitute with sponge cake cut into strips, or even make your own at home!
- Can I freeze tiramisu? While it is best fresh, you can freeze it for up to 1 month. Just wrap it well to prevent freezer burn.
- How do I know when it’s set? The mascarpone layer should be firm to the touch; it becomes more stable after chilling overnight.
- Can I make it gluten-free? Yes! Look for gluten-free ladyfingers or make your own with gluten-free flour.
Wrapping Up
Tiramisu is more than a dessert; it’s a shared experience that brings people together at the table. With its creamy richness and delightful flavors, this classic cake is sure to become a staple in your home, just as it has in mine. So, gather your ingredients, and let’s create a little piece of Italy in your kitchen. Celebrate the joyous moments and sweeten your gatherings with this timeless treat. Happy cooking! 🍰
PrintClassic Tiramisu Cake

A timeless Italian dessert featuring layers of creamy mascarpone and ladyfingers dipped in coffee, perfect for any occasion.
- Prep Time: 20 minutes
- Cook Time: 15 minutes
- Total Time: 240 minutes
- Yield: 12 servings 1x
- Category: Dessert
- Method: No-Cook
- Cuisine: Italian
- Diet: Vegetarian
Ingredients
- 3 cups strong brewed coffee, cooled
- 1 cup sugar
- 2 cups mascarpone cheese
- 1 cup heavy cream
- 1 teaspoon vanilla extract
- 36 ladyfinger cookies
- Cocoa powder for dusting
- Dark chocolate shavings (optional)
Instructions
- Combine the cooled coffee and sugar in a mixing bowl, stirring until the sugar is completely dissolved.
- Prepare the mascarpone cheese by beating it in another bowl until smooth.
- Whip the heavy cream and vanilla extract in a separate bowl until soft peaks form.
- Fold the whipped cream into the mascarpone mixture, ensuring a gentle incorporation.
- Dip each ladyfinger quickly into the coffee mixture, being careful not to soak them.
- Layer half of the dipped ladyfingers in a baking dish, then spread half of the mascarpone mixture over the top.
- Repeat the layering process with the remaining ladyfingers and mascarpone, finishing with a layer of mascarpone.
- Chill the dish covered in the refrigerator for at least 4 hours or overnight.
- Dust the top with cocoa powder and add chocolate shavings before serving.
Notes
Serve with rich espresso or vanilla ice cream for the perfect pairing. Store leftovers tightly covered in the refrigerator for up to 3 days.
Nutrition
- Serving Size: 1 serving
- Calories: 300
- Sugar: 14g
- Sodium: 75mg
- Fat: 18g
- Saturated Fat: 11g
- Unsaturated Fat: 7g
- Trans Fat: 0g
- Carbohydrates: 30g
- Fiber: 0g
- Protein: 5g
- Cholesterol: 60mg