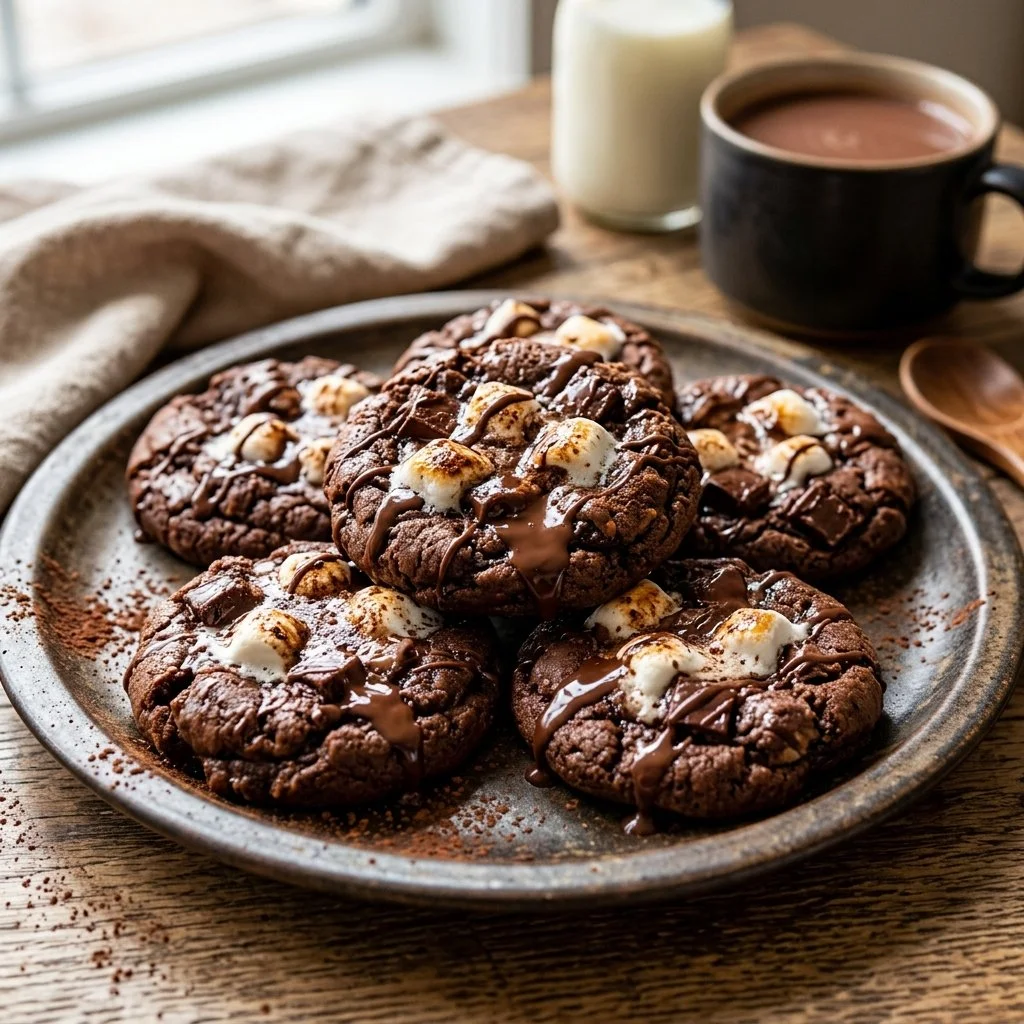
As the chill of winter winds its way into our homes, there’s something undeniably magical about indulging in a classic comfort treat: cookies. Imagine a cozy afternoon spent in the warmth of your kitchen, the sweet aroma of melting chocolate and toasted marshmallows filling the air. These moments are a reminder of childhood memories spent by the fireplace, sipping hot cocoa on snowy days. That feeling of warmth and nostalgia is precisely what inspired me to create my Hot Cocoa Cookies. These delightful morsels capture the essence of a steaming cup of hot cocoa, bringing all its rich flavors into cookie form.
Recipe Timing
- Prep Duration: 15 minutes
- Active Cooking: 12 minutes
- Total Duration: 27 minutes
- Portion Size: About 24 cookies
- Complexity: Simple
Nutritional Recipe
- Calories per portion: Approximately 150 calories
- Protein: 2 grams
- Carbs: 21 grams
- Fats: 7 grams
- Fiber: 1 gram
- Sugars: 10 grams
- Sodium: 85 mg
Why You’ll Love These Hot Cocoa Cookies
If you’re a chocoholic or simply love a delightful treat, you’re going to adore these Hot Cocoa Cookies! They are soft and chewy, with a rich chocolate flavor that’s punctuated by sweet pockets of gooey mini marshmallows and chocolate chips. Picture your family gathered around the table, smiles lighting up their faces as they reach for a cookie, the warmth of a homemade treat melting in their mouths. They’re perfect for holiday baking, casual get-togethers, or simply as a comforting indulgence after a long day.
The Complete Cooking Journey
This recipe is straightforward and forgiving, making it accessible for bakers of all levels. Gather your ingredients, preheat your oven, and let’s embark on this delightful baking adventure together!
Ingredients:
- 1 cup butter, softened
- 1 cup sugar
- 1 cup brown sugar, packed
- 2 large eggs
- 1 teaspoon vanilla extract
- 2 cups all-purpose flour
- 1/2 cup cocoa powder
- 1 teaspoon baking soda
- 1/4 teaspoon salt
- 1 cup chocolate chips
- 1/2 cup mini marshmallows
Method:
Step 1: Preheat the Oven
Preheat your oven to 350°F (175°C). This initial step ensures that your cookies bake evenly and acquire that perfect chewy texture.
Step 2: Cream the Butter and Sugars
In a large bowl, cream together the softened butter, sugar, and brown sugar until smooth. This creates a luscious base that will make your cookies rich and flavorful.
Step 3: Incorporate the Eggs and Vanilla
Beat in the eggs one at a time, making sure each one is fully incorporated before adding the next. Then add in the vanilla extract, allowing that sweet aroma to fill your kitchen.
Step 4: Mix the Dry Ingredients
In a separate bowl, combine the flour, cocoa powder, baking soda, and salt. Gradually add this dry mixture to the butter concoction, stirring until just combined. Be careful not to overmix; you want soft cookies, not dense bricks!
Step 5: Add Chocolate and Marshmallows
Now for the fun part! Stir in the chocolate chips and mini marshmallows. When you take a bite of these cookies, you’ll be rewarded with bursts of melted chocolate and chewy marshmallow.
Step 6: Scoop Dough onto Baking Sheet
Using a spoon or cookie scoop, drop spoonfuls of dough onto ungreased baking sheets, leaving space for them to spread out while baking.
Step 7: Bake to Perfection
Bake for 10-12 minutes, or until the edges are set but the centers are still soft. Remember, they’ll continue to cook slightly after being removed from the oven!
Step 8: Cool on Wire Racks
Allow the cookies to cool on the baking sheets for a few minutes before transferring them to wire racks to cool completely. This step is essential for achieving the perfect texture.
Serving Suggestions & Pairings
For the ultimate hot cocoa experience, serve your cookies alongside a steaming cup of hot chocolate topped with whipped cream. You might even consider garnishing your cups with extra marshmallows or a sprinkle of cinnamon for a cozy touch. These cookies also pair wonderfully with a scoop of vanilla ice cream or a dollop of whipped cream for an indulgent dessert.
Storage & Leftovers Guide
To keep your cookies fresh, store them in an airtight container at room temperature for up to a week. For longer storage, consider freezing them—simply place the baked cookies in a single layer in a freezer bag or container. They will stay delicious for up to three months. When you’re ready to enjoy them, just thaw at room temperature or pop them in the microwave for a few seconds to regain that fresh-from-the-oven warmth.
Kitchen Wisdom & Success Tips
- Room Temperature Ingredients: Using room temperature butter and eggs will help you achieve a smoother batter, resulting in fluffier cookies.
- Don’t Overbake: To keep cookies soft, err on the side of underbaking; they should look slightly underdone when you take them out of the oven.
- Experiment With Add-ins: Feel free to mix and match your favorite extras—chopped nuts, dried fruit, or even a sprinkle of sea salt on top can elevate these cookies.
Flavor Variations & Adaptations
Consider adding flavors like peppermint extract during the holiday season or swapping in white chocolate chips for a different twist. You could even experiment with nut flours for a gluten-free version; just remember to adjust the liquid content accordingly.
Reader Questions & Solutions
-
Can I use margarine instead of butter?
Yes, but using butter will give you richer flavor and better texture. -
What if I don’t have cocoa powder?
You may substitute with Dutch-processed cocoa, but flavors will slightly vary. -
How can I ensure my cookies are uniformly shaped?
Use a cookie scoop to create equal sizes for even baking. -
Why are my cookies flat?
Check that your baking soda hasn’t expired and ensure you’re using the right amount of flour. Measuring too liberally can lead to flat cookies. -
Can I substitute some of the flour with whole wheat flour?
Absolutely! You can replace half with whole wheat flour for added fiber, but keep in mind they may turn out denser.
Wrapping Up
Baking these Hot Cocoa Cookies is more than just making a treat; it’s about capturing the essence of coziness and celebration in each bite. So, whether you’re sharing them with family, taking them to a party, or sneaking a few for yourself (we won’t tell!), these cookies are sure to bring warmth and joy into your kitchen. I hope you enjoy every chew and the happiness that comes along with baking and sharing! Happy baking!